Find all the necessary information here to successfully use our recommendation engine
- Integration guides of Unas, Shoprenter and further webshops,
- using the Yuspify design editor,
- possible error messages and their solutions,
- useful content related to trial period and billing.

Design editor
In this section, we will guide you through the steps required to go live with the recommendation boxes and start your trial period.
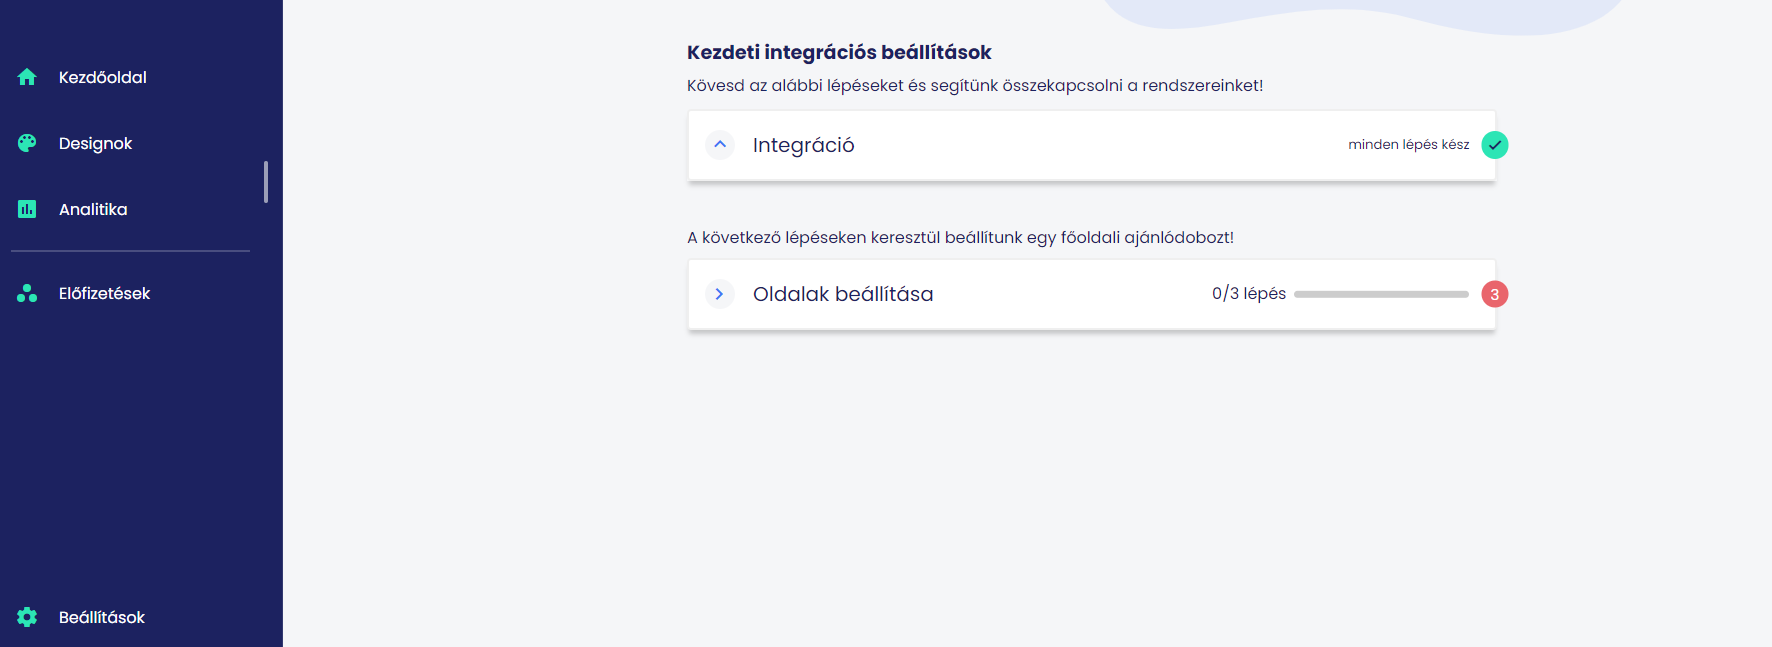
After you have completed the integration steps – regardless of the webshop engine – you will find the recommendation box editor on the Yuspify admin interface. If you were not automatically redirected, click on the Home icon and select the Page Wizards menu.
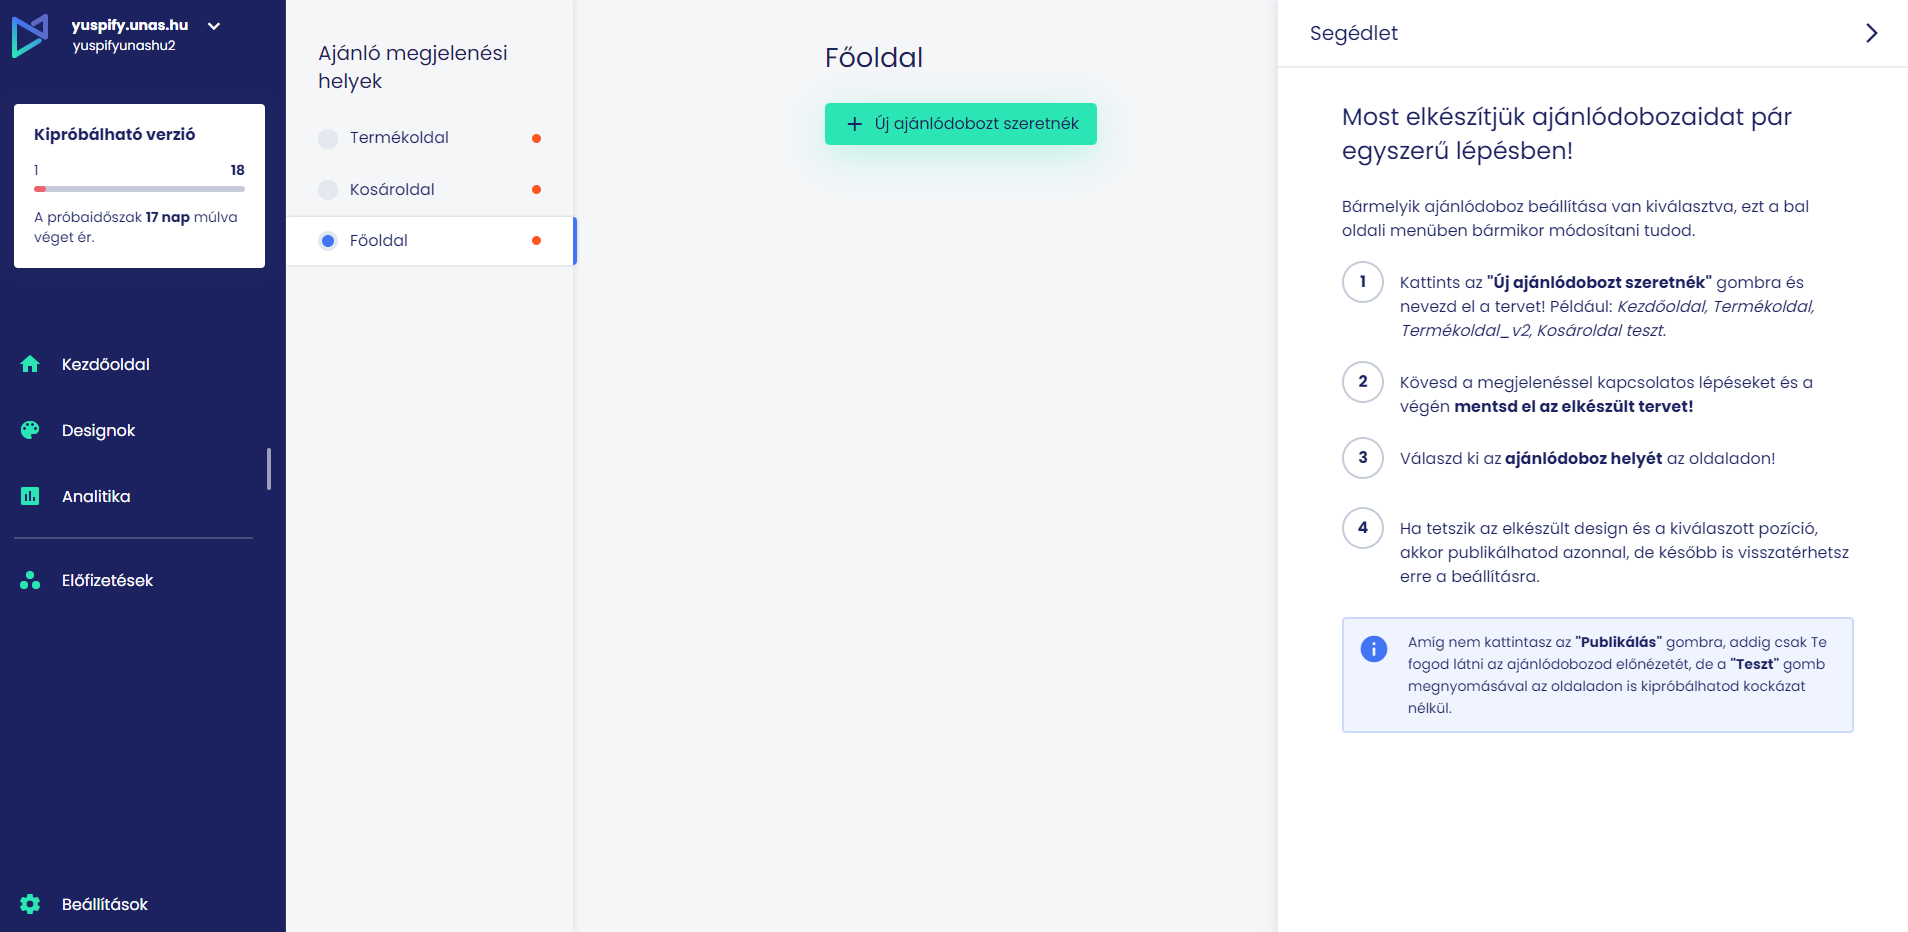
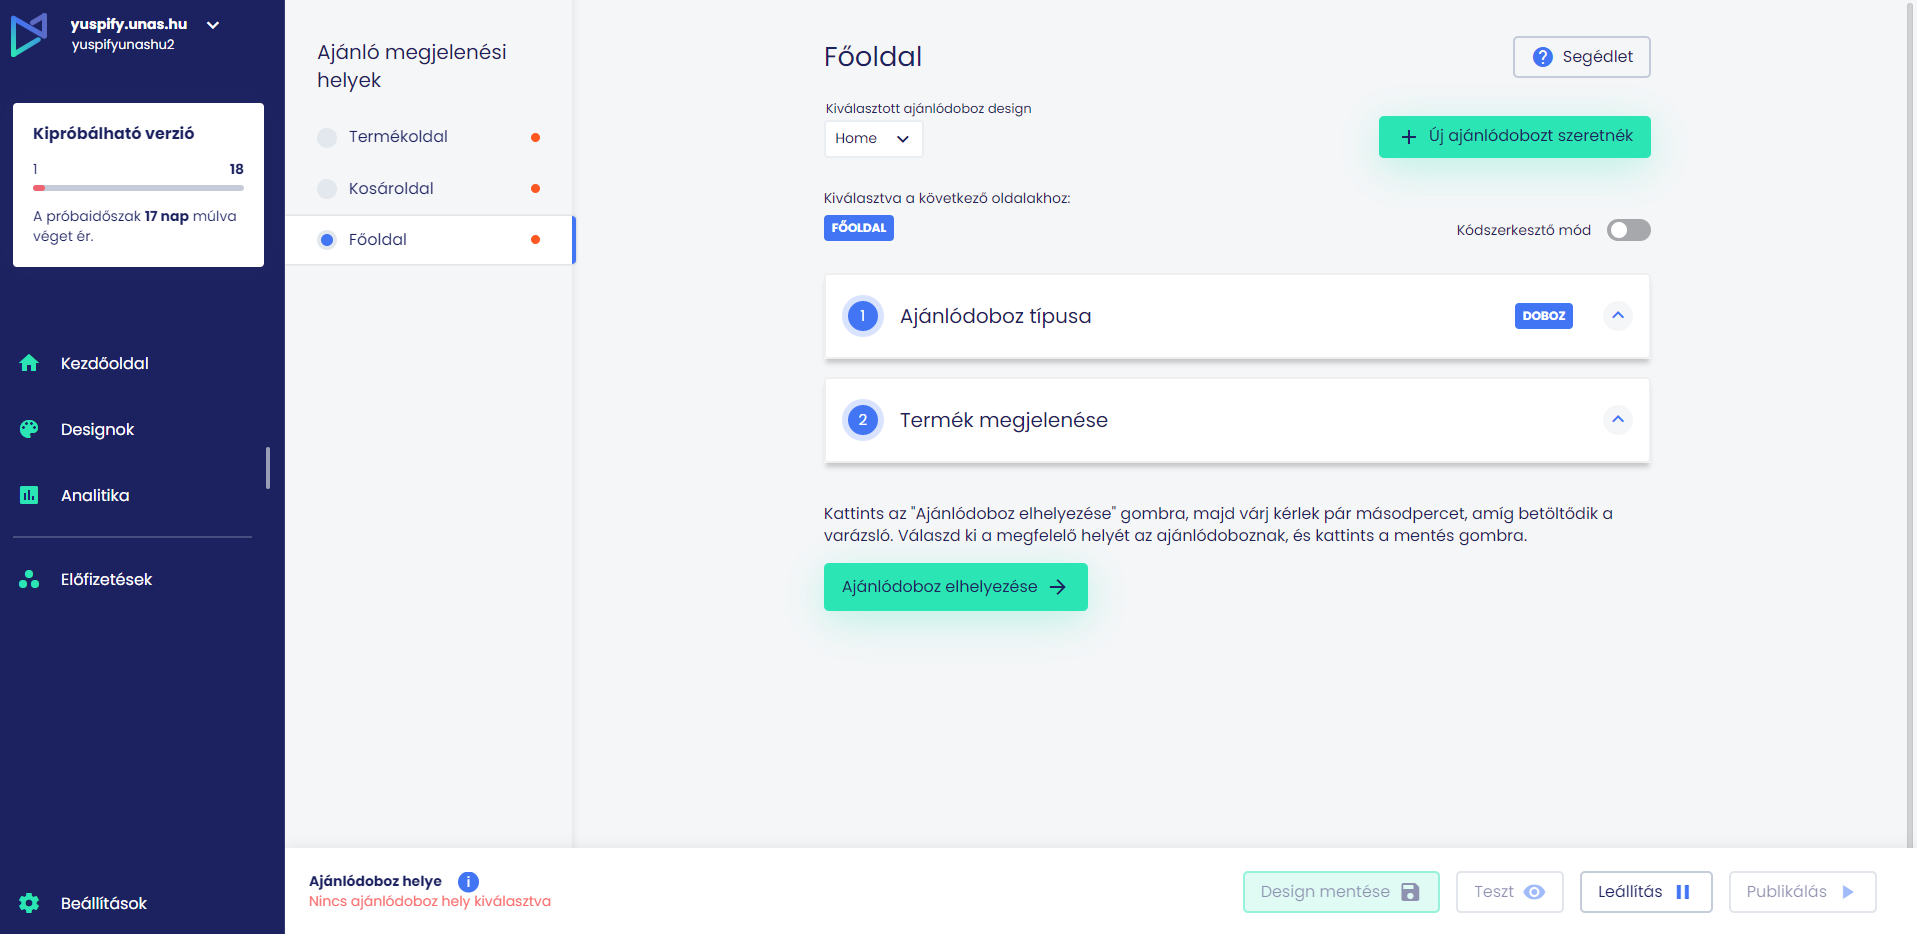
At the left sidebar, you will see which page’s recommendation boxes you are editing at the moment. The below image shows, that the Home page is selected. For now, it is and empty space because we haven’t even created a design yet. If you are not satisfied with your first design, but do not want to delete it, you can always create a new one at any time by clicking on the New recommendation box design button.
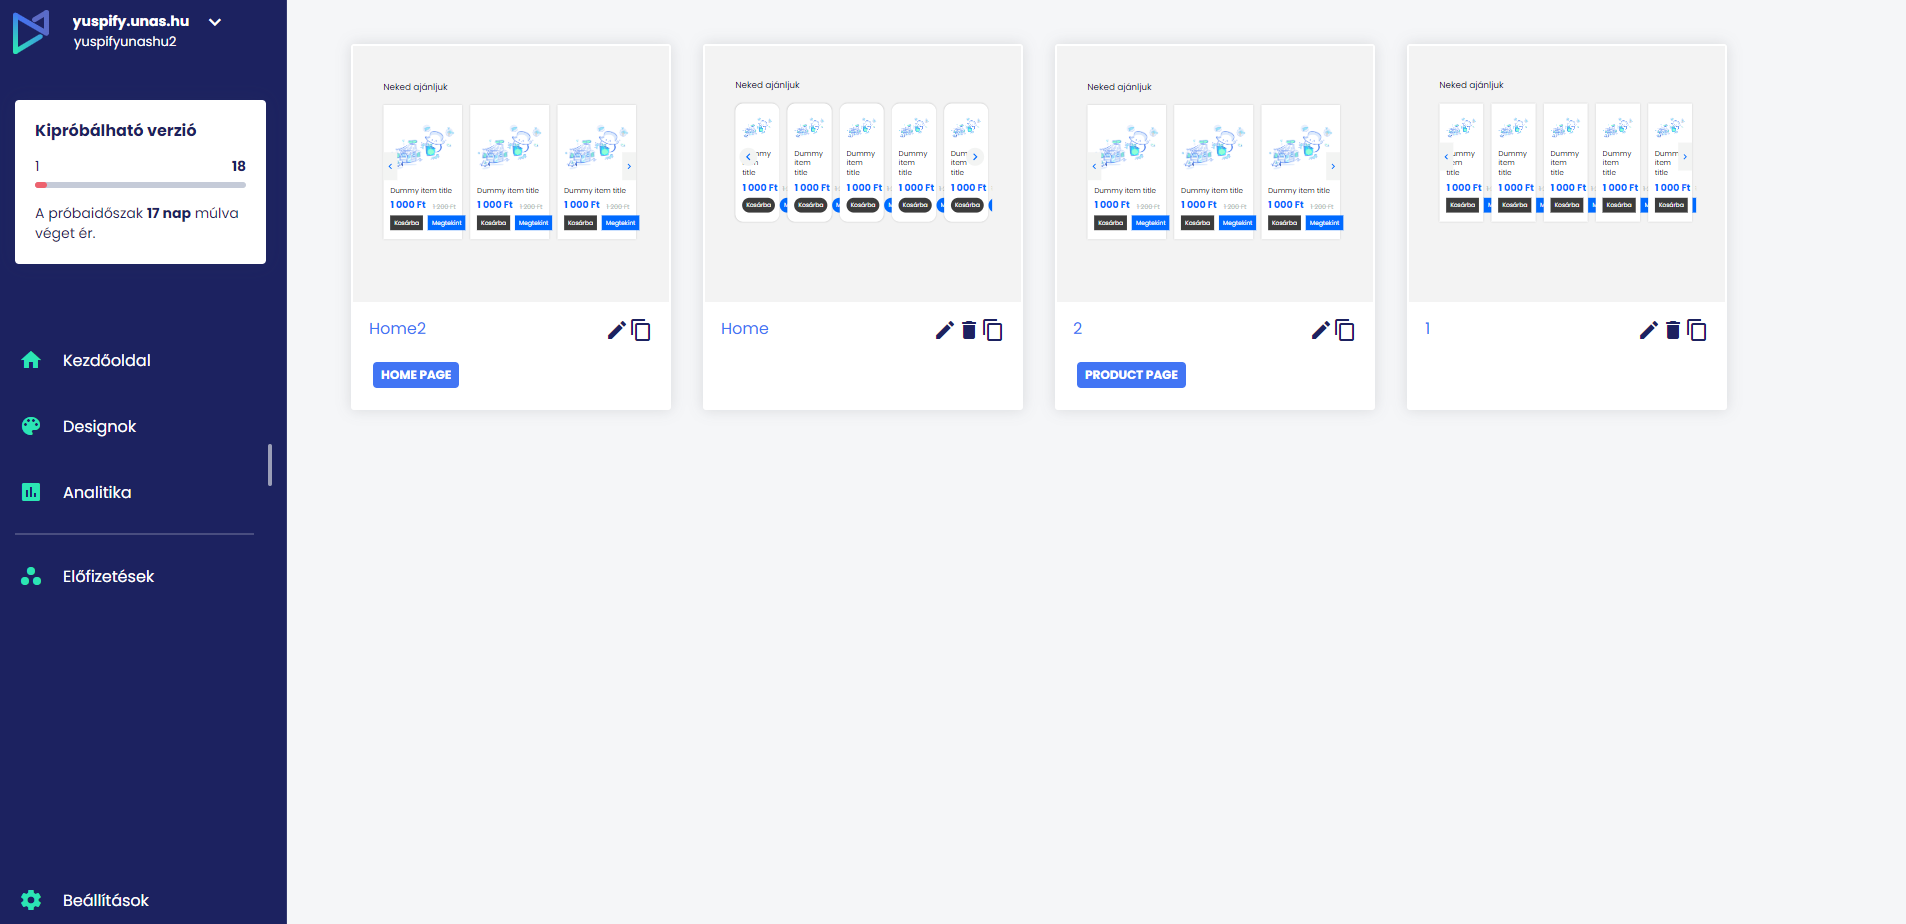
You should find all your design templates under the Designs menu (left side).
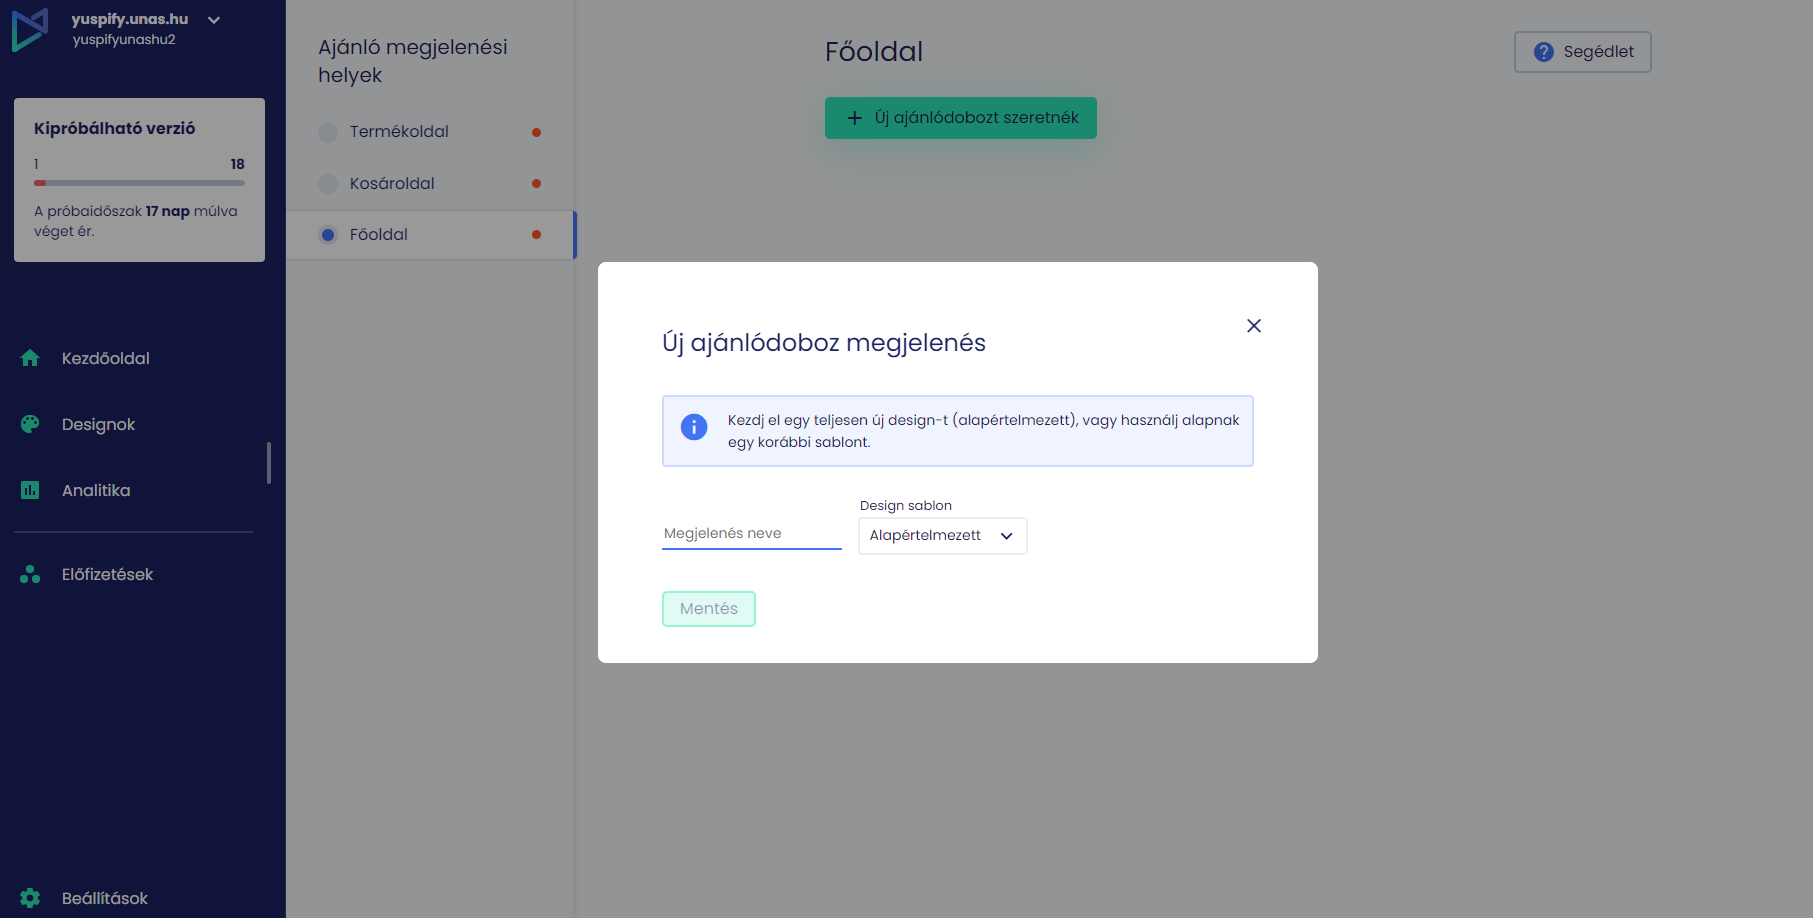
By clicking on the New recommendation box design button, a pop-up window will appear: here you have to give a name to the design. Leave the Design template on Default – but in the future, if you want to modify something on a previously created one, without deleting the original, you will be able to select it from the drop-down list here.
Enter the name of the design, then click the save button.
Your first design template has been created, in our example we call it Home, and the blue Home badge shows that it is currently selected only for the Home page. This is useful information in case you want to use the same design for the Cart page. Click on Choose layout type.
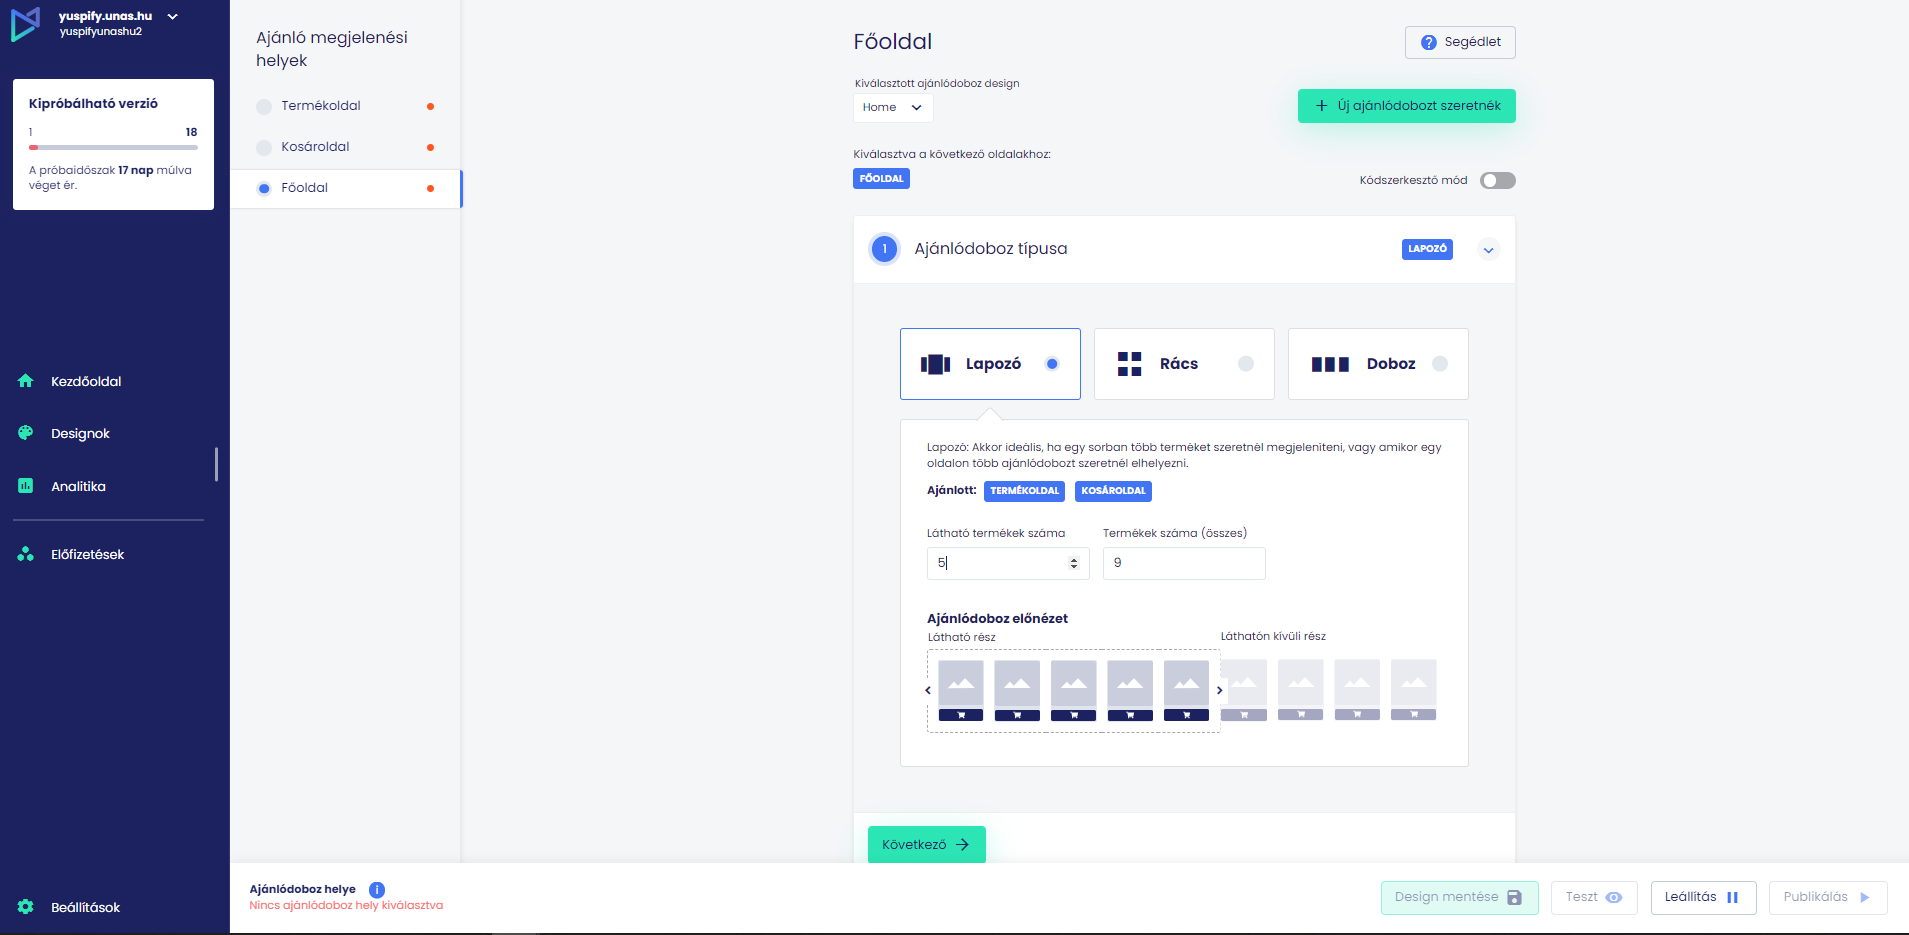
Here you can pick you most preferred layout for this template: :
- carousel: a certain number of items will be visible in the recommendation box, your visitors can access the rest by clicking on the arrows (or scrolling on a mobile phone),
- grid: you can set it to 3 x 4 for instance, so you are going to display a total of 12 items in the recommendation box.. We typically recommend this for the main page,
- box: as many products as you set will appear in one row.
If you have found the right one, just click on Next!
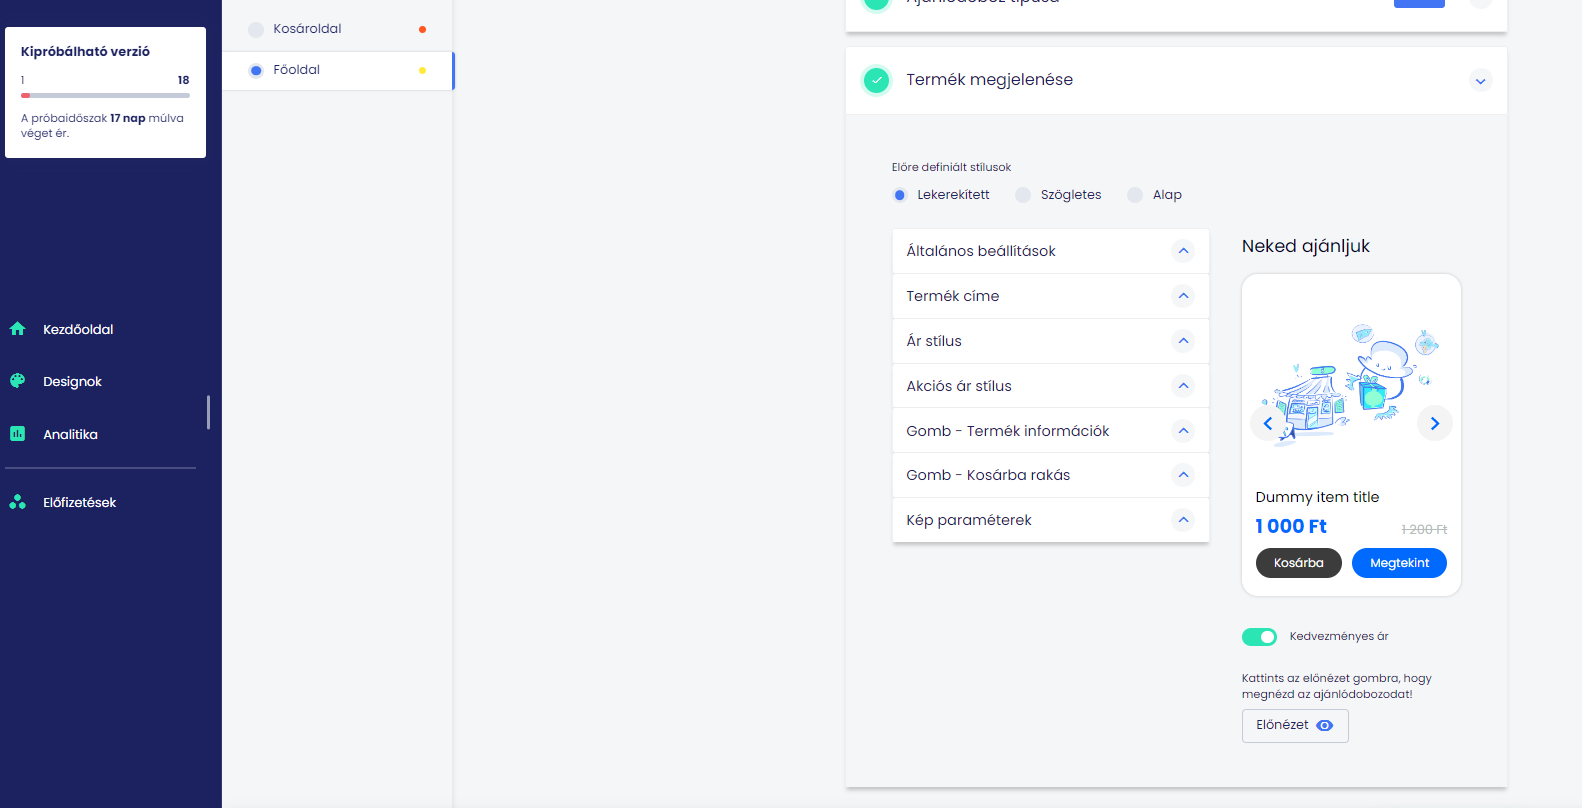
We are now at the Design the box settings! Here you cna customize many properties, just choose the right one from the possible options. We have prepared 3 predefined styles for you:
- a square version,
- a rounded version,
- and a basic one, where the arrows are squared as well.
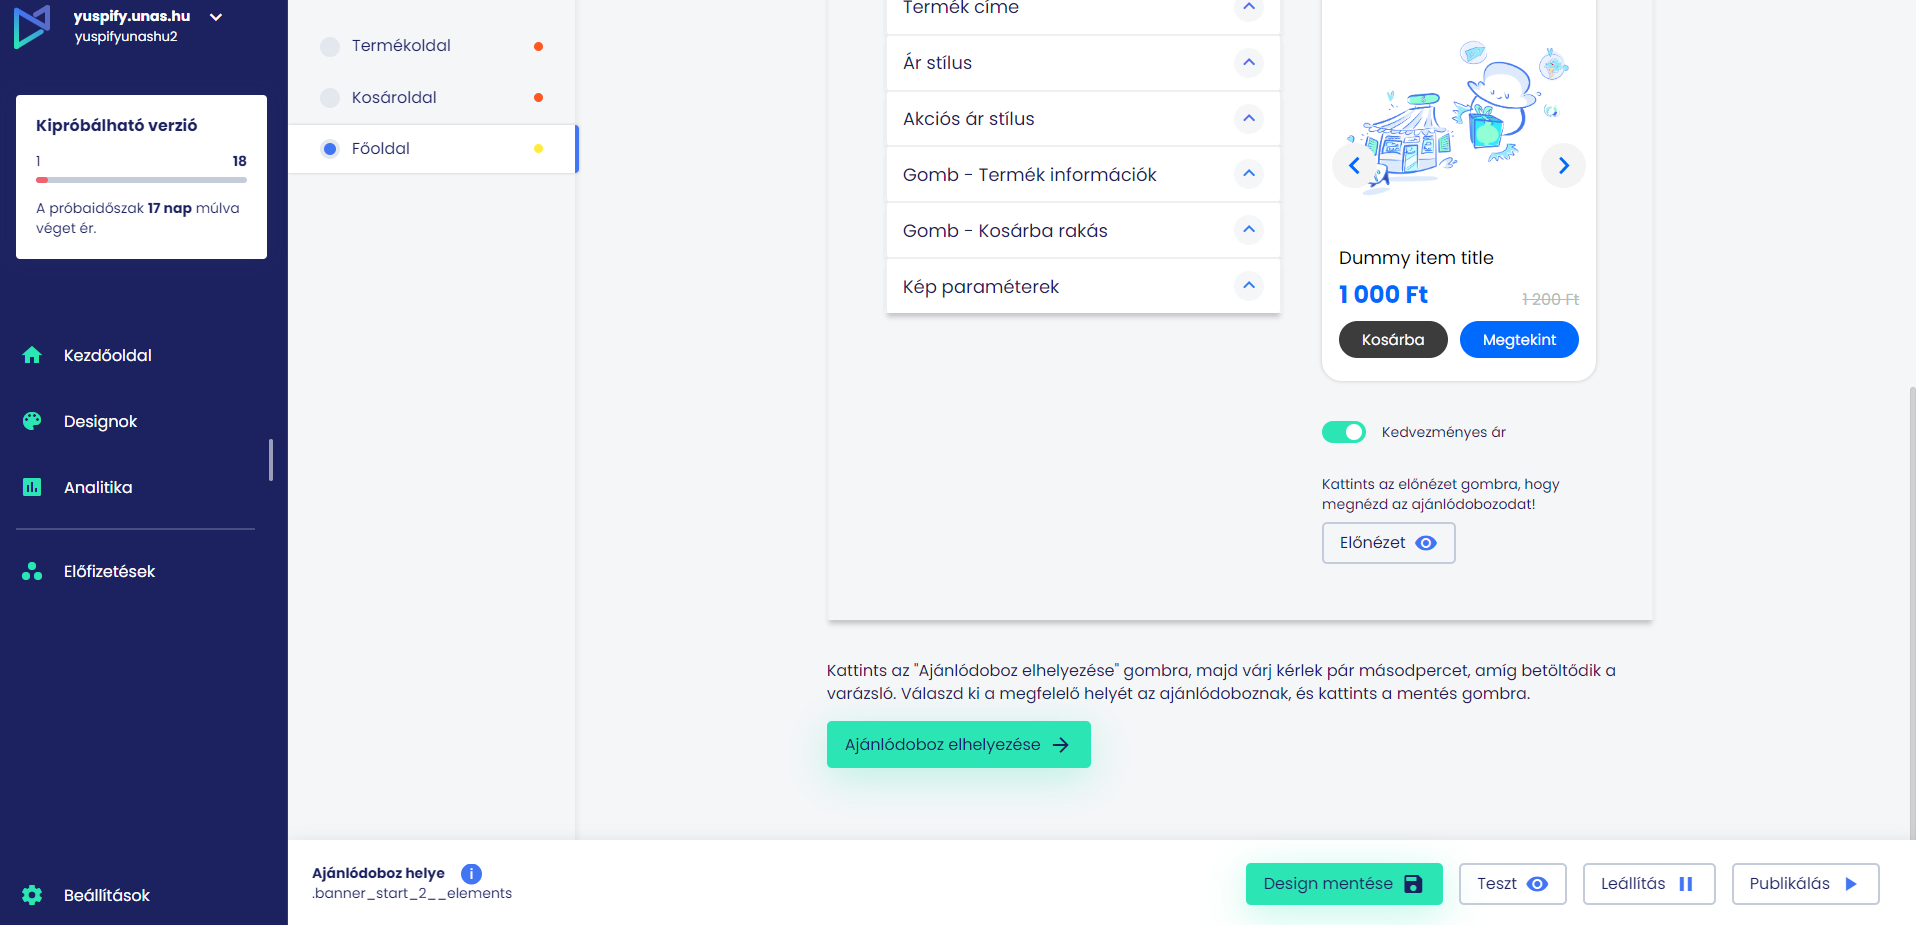
In our example the sale price properties are opened, where you can change colors, fonts and sizes, but for example under General settings, you can specify what title should the recommendation box have. Here we call it: Recommended for you.
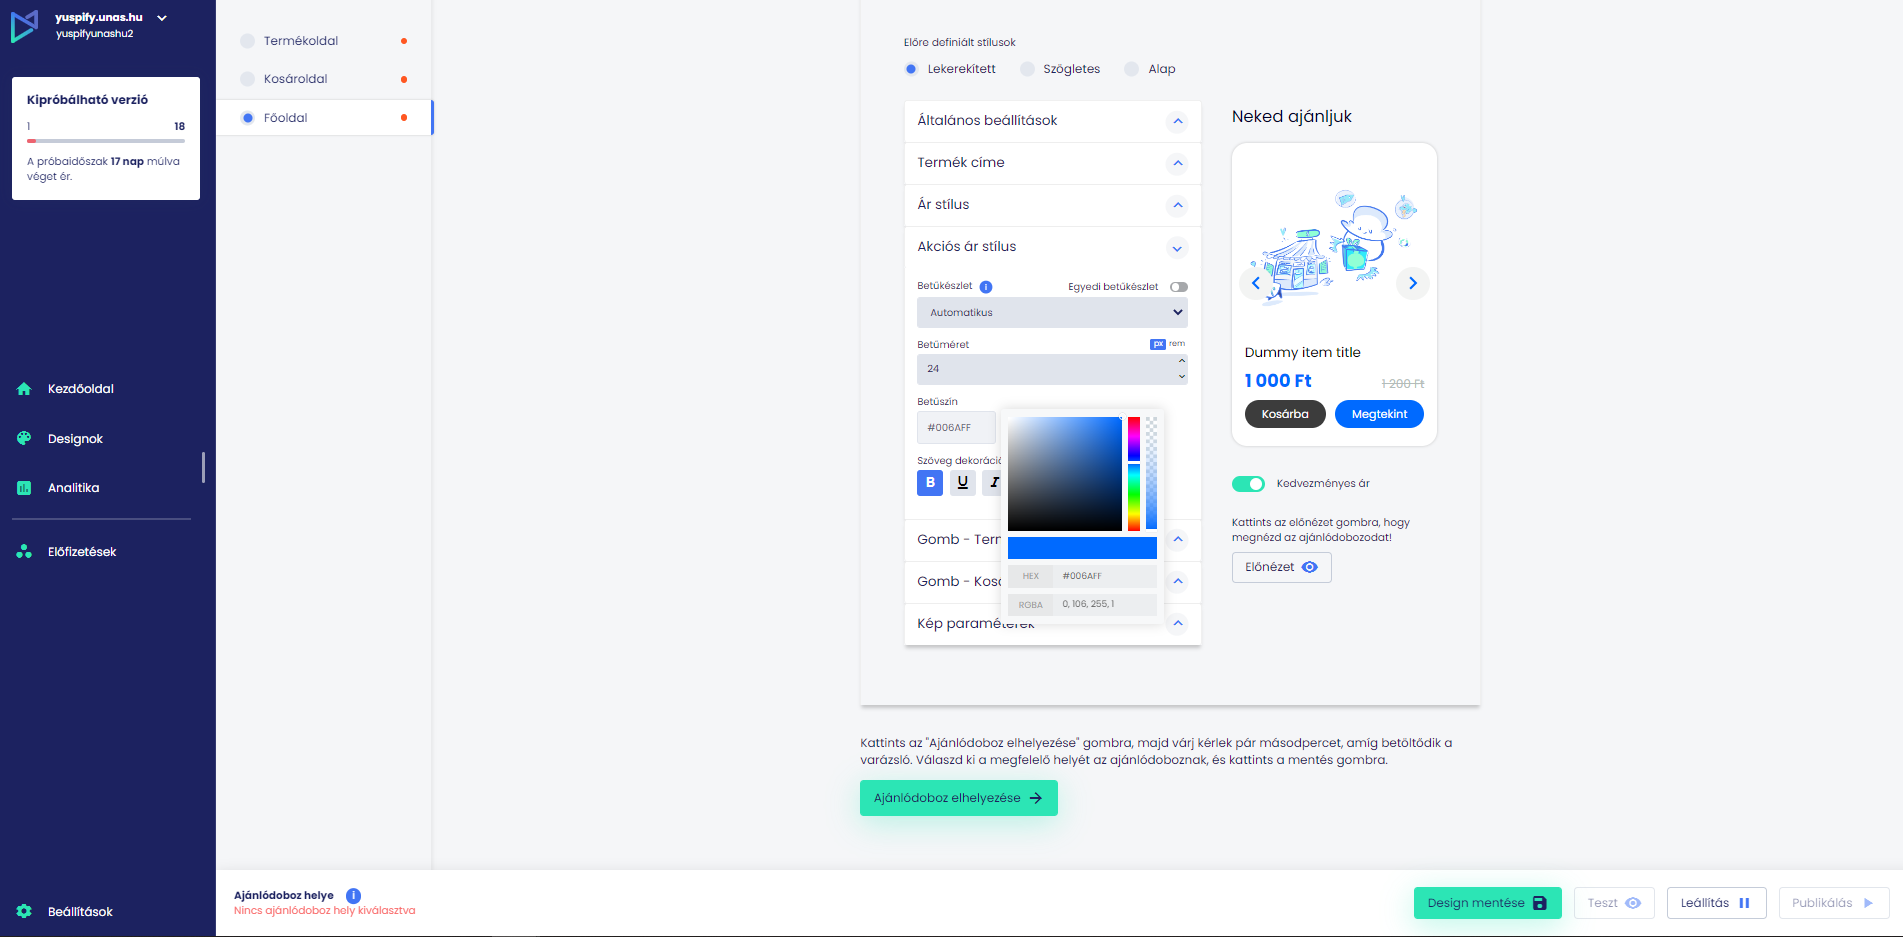
When you are done with your settings, click on the Save design button. Don’t worry, this will not yet activate the box on the live site. First we have to find it’s right position. Let’s do it in the next step!
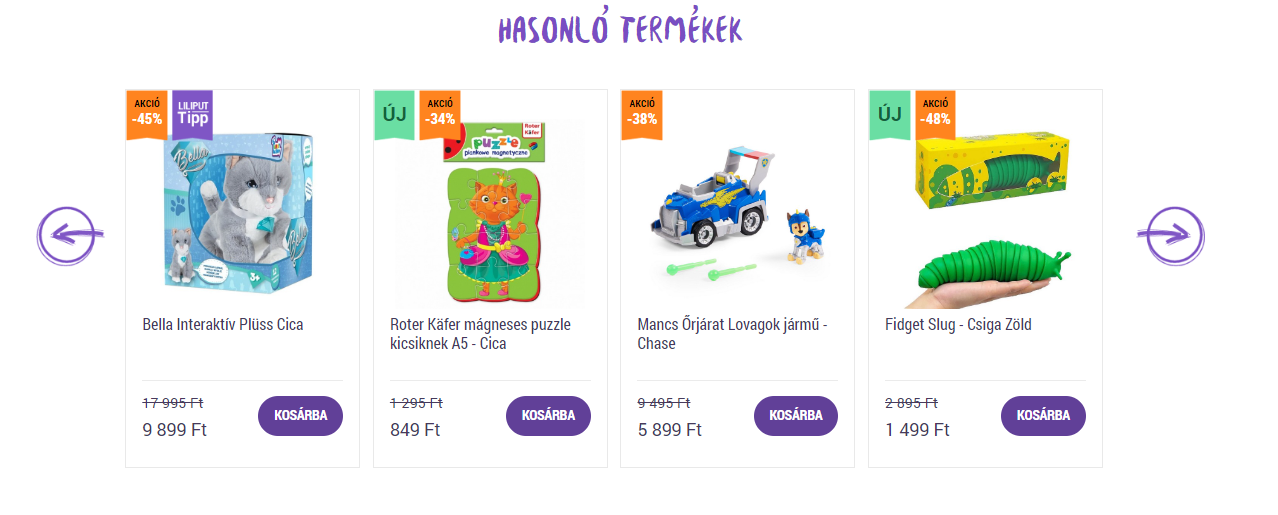
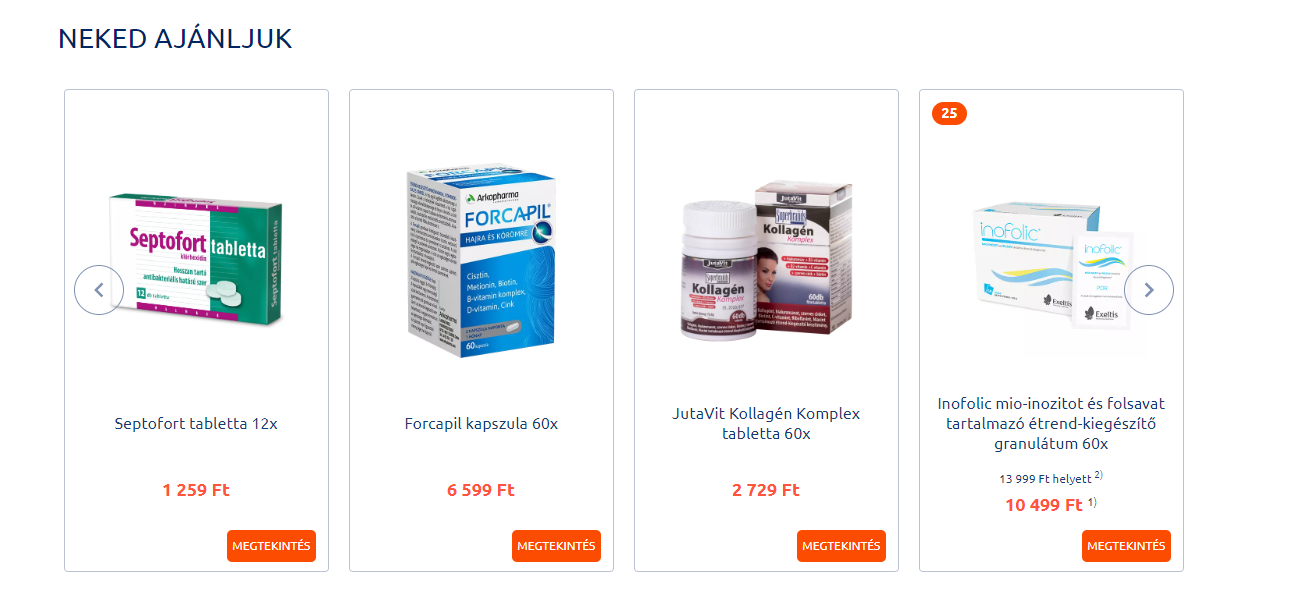
In Yuspify’s editor, you can completely customize the look of the recommendation boxes to match your webshop perfectly. We also show two examples:
liliputjatek.hu
benu.hu
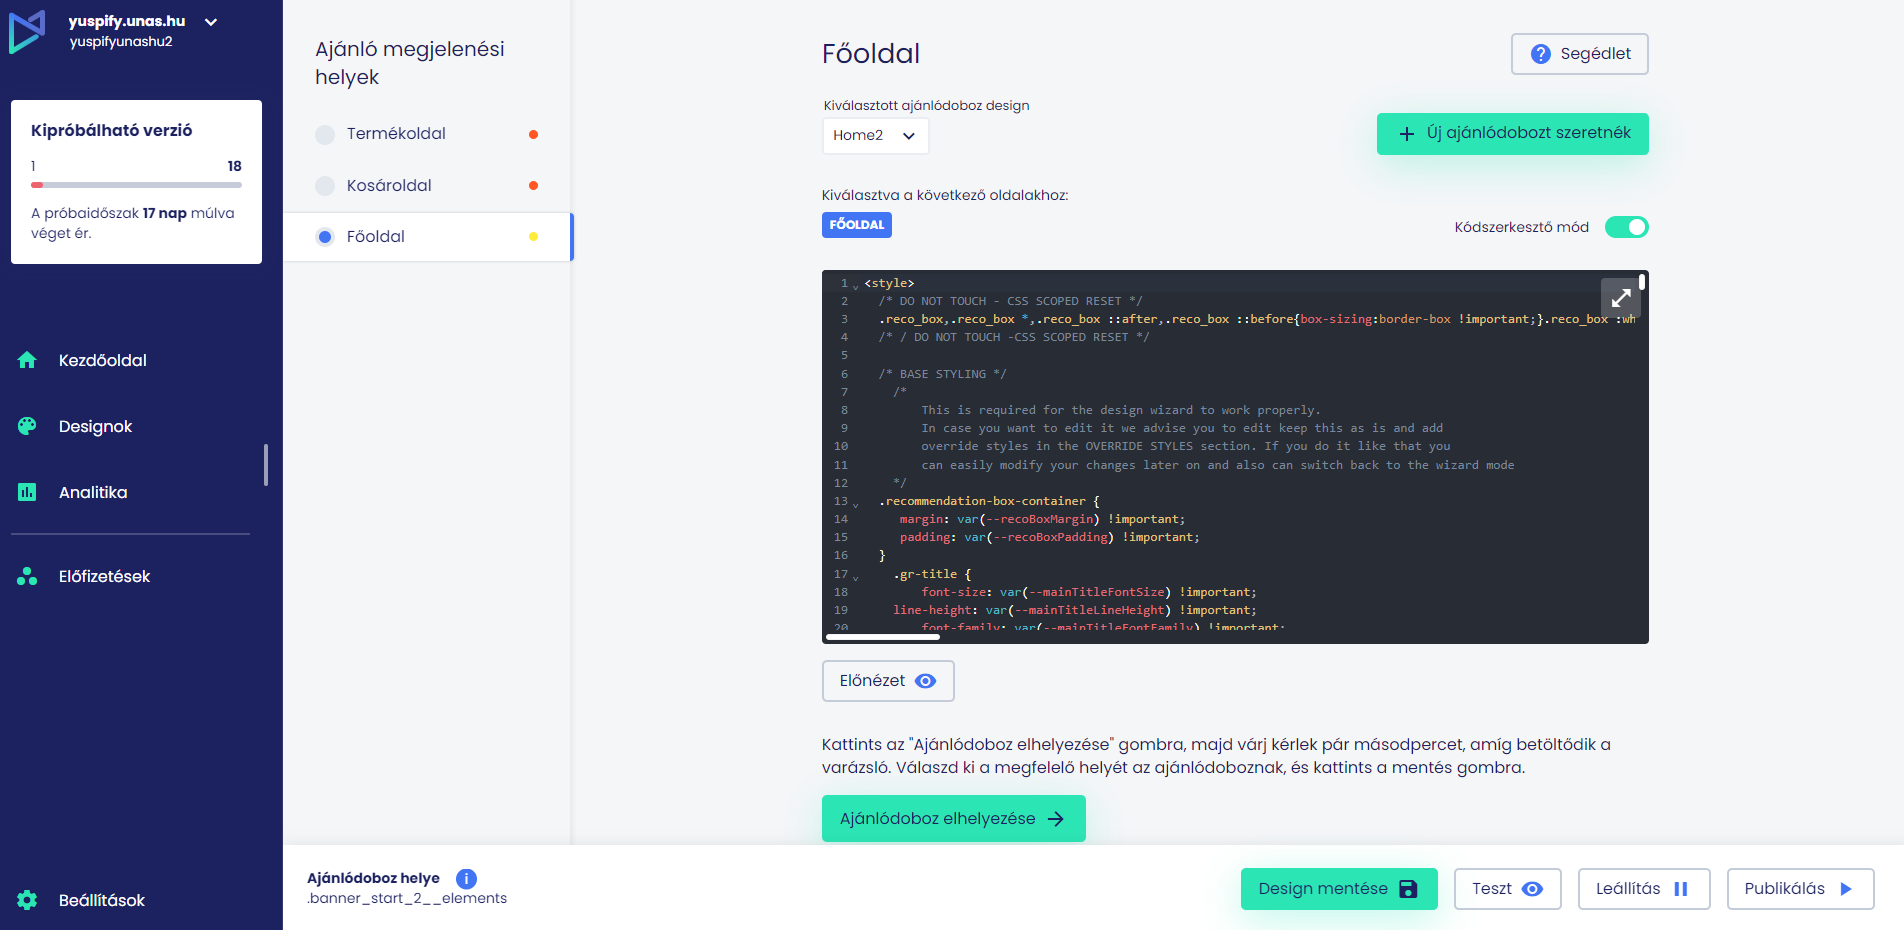
To do this, all you have to do is create a new design and turn on the Code Editor mode before starting the first step:
If you want such a unique recommendation box, but you can’t make it yourself, just write to us at support@yuspify.com for a unique offer and our experts will help you.
You’re done with your first desgin, it’s great! Click on the save design button. This will not get you to the live page, you have to find the perfect position on the main page first. You can also see in the lower left corner that the position of the recommendation box has not yet been selected, but we will do so now: Click on the Place recommendation box button!

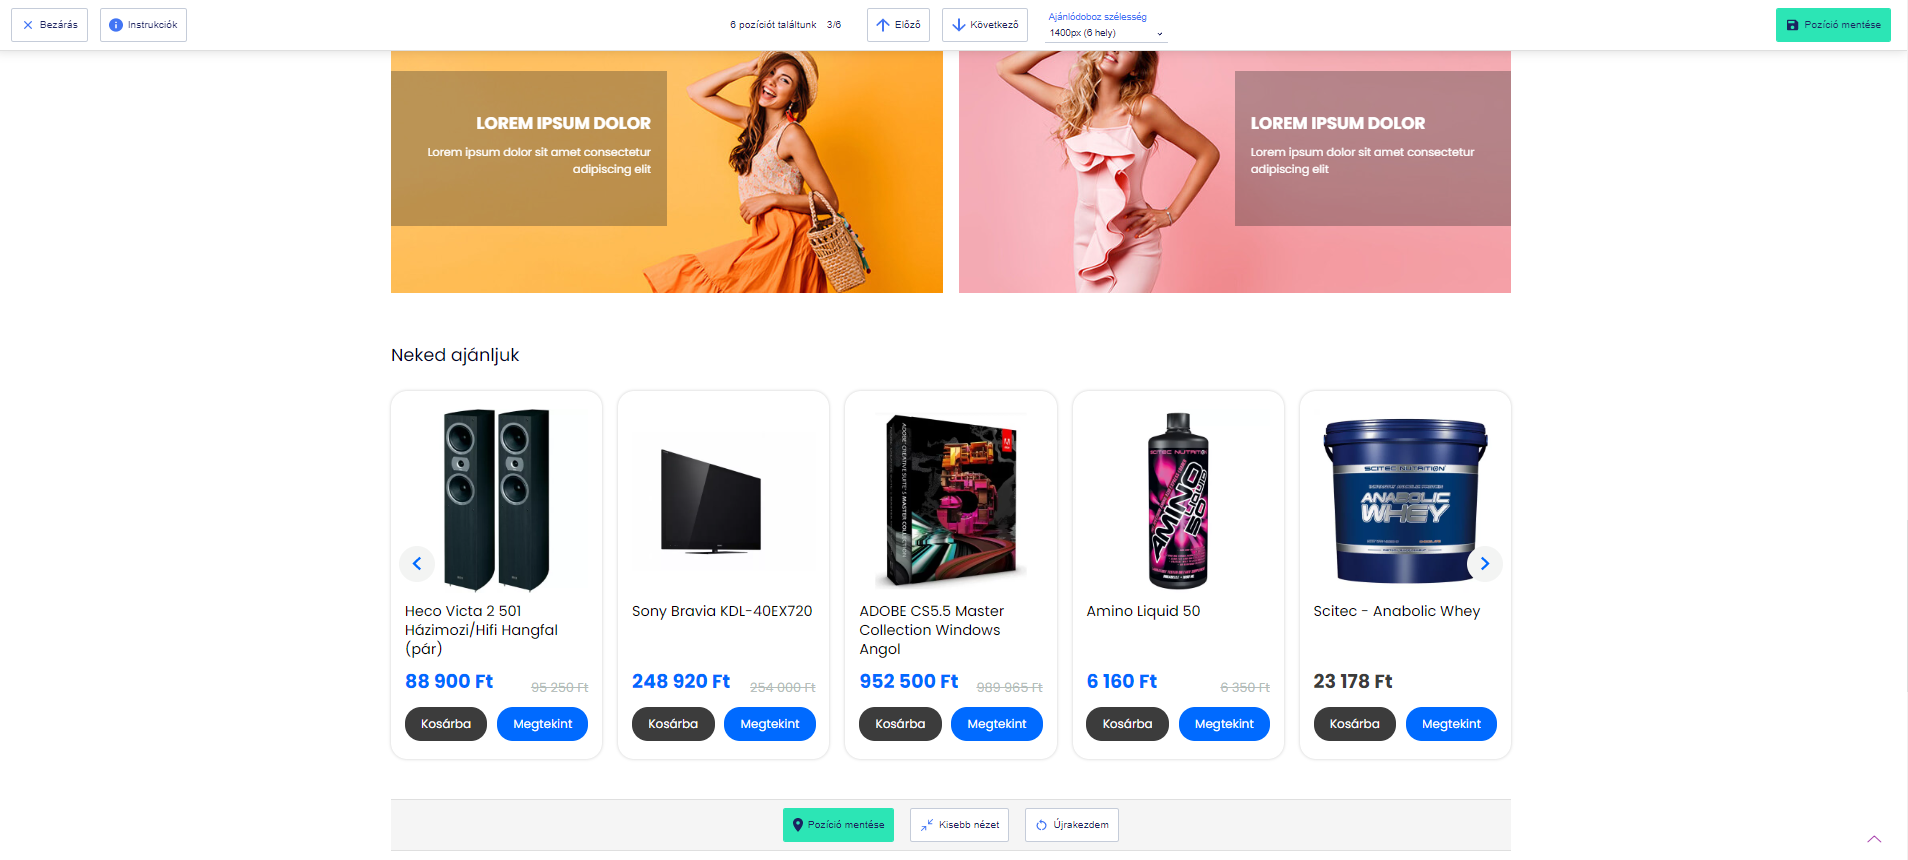
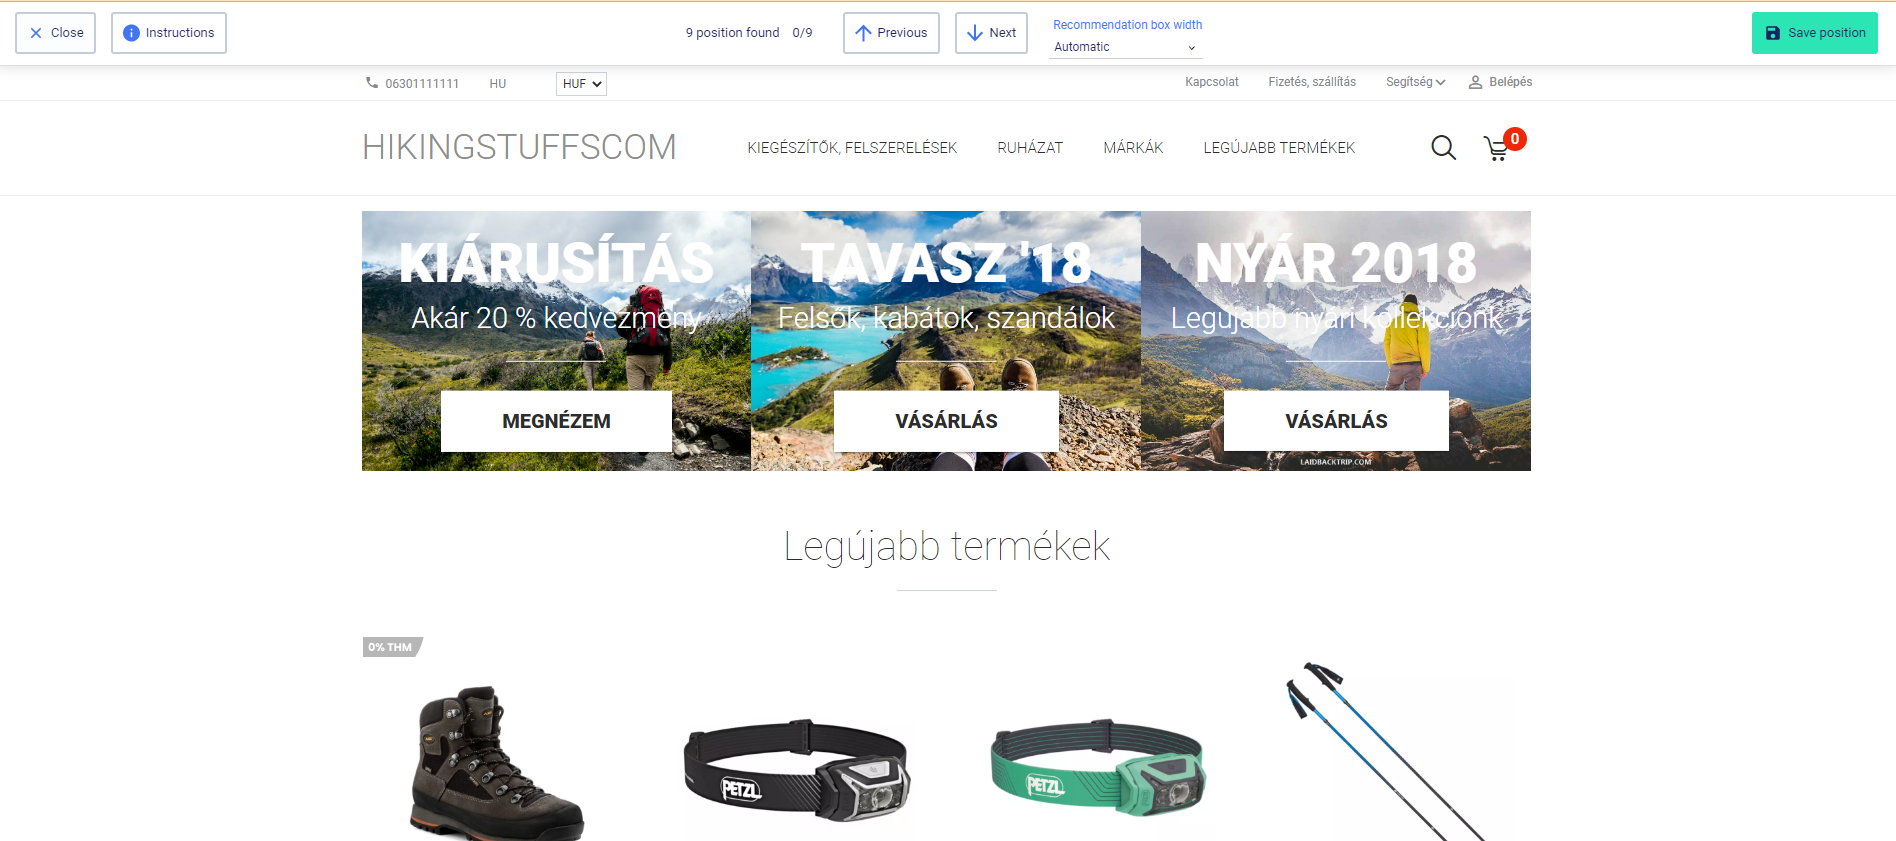
Now our editor opens on a new page, which shows you the steps you can take to find the right position with a short explanatory video. You can find this listed in the top bar. If you see Automatic, it means that we display all possible positions, but you also have the option to filter for positions of a certain size. In our example, 1400px is selected, of which there are 6 on the page.
Use the arrows to find the one that suits you best, then click the save position button either under the recommendation boxes or in the upper right corner. Click the Close in the upper left corner when you’re done.
The system will redirect you to the Yuspify admin interface, where you can see the exact location of the recommendation box in the lower left corner. It is important that your recommendation box only appears on the live page if you click on the Publish button.
If you later want to stop this referral box and create a new one, just go back to the Main Menu and click the Stop button. This will pause your referral box.
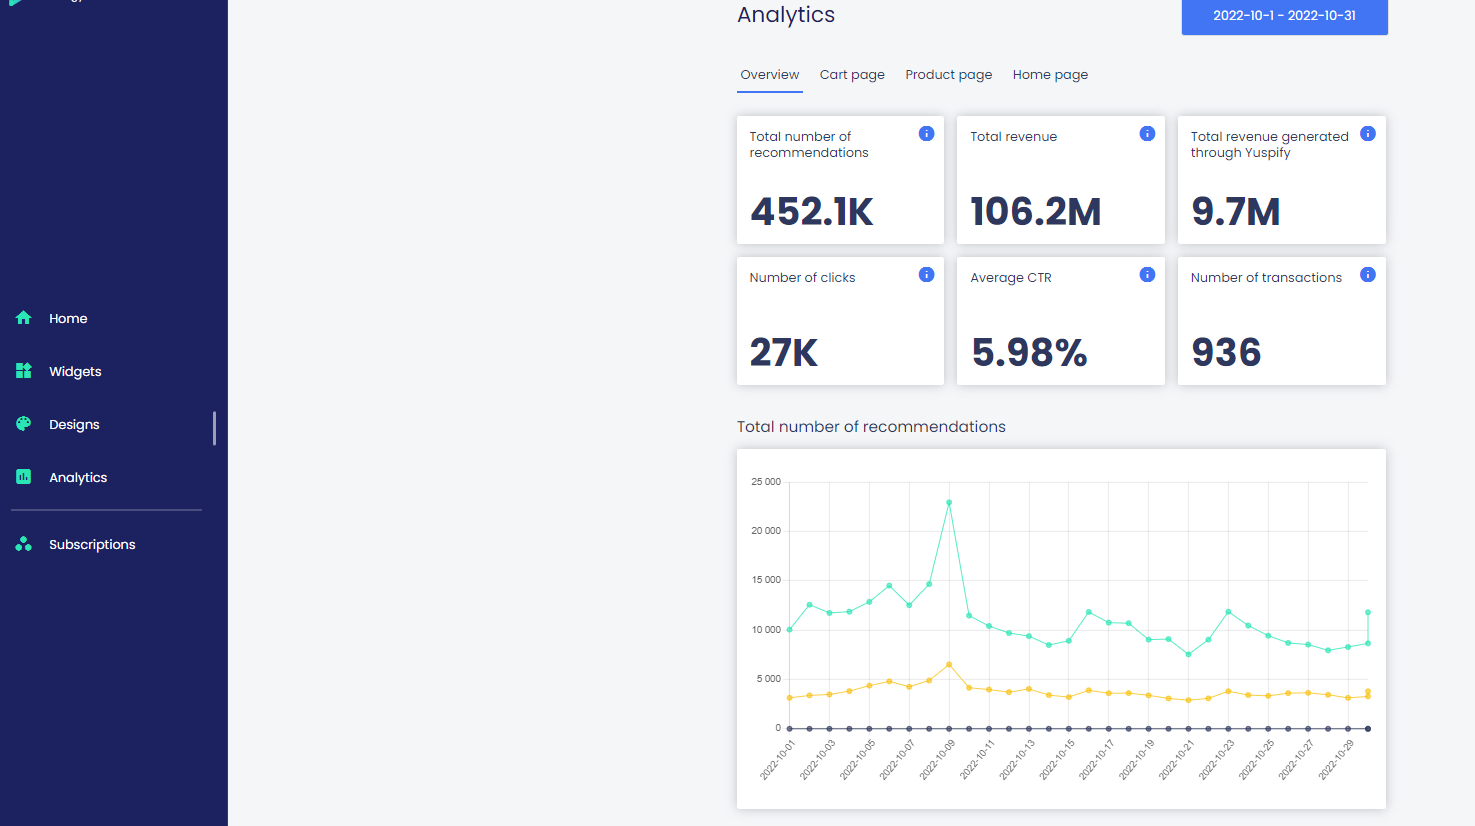
After you have activated your recommendation boxes and started your trial period, you can monitor the performance of the recommendations on the Analytics tab. In the example below, you can see that 2 of the 3 possible referral boxes were active for this client in October 2022. Our product side and main side box in total
- Served 452,000 recommendations (1 recommendation means loading 1 recommendation box, regardless of how many products appear in it)
- their average click-through rate (CTR) was 5.98%,
- 936 transactions were generated (we count all product sales that were clicked through Yuspify’s offer boxes and bought within 24 hours. We track only those cases where useres accepted the cookie policy.)
- this meant a minimum revenue of HUF 9,700,000 (24 250 USD) for our client (it does not apply to the entire basket value, but only to the products sold by Yuspify)
- that’s 9.1% of its total revenue.
Possible error messages and their solutions
We have collected some typical examples of error messages that our customers have encountered so far, here you can find their solutions.
Ha a rendszerünk nem találja automatikusan a követőkódodat, kattints a Kézzel ellenőrzöm gombra. Ekkor egy új ablakban fog betöltődni a weboldal, és ha tracking code beillesztése helyes, akkor egy pop-up ablakban megjelenítjük.
Ezt követően térj vissza az integrációs lépésekhez és kattints a következő gombra.
If our system does not find your tracking code automatically, click the Check manually button. Your webshop will then load in a new window, and if the tracking code is inserted correctly, it will be displayed in a pop-up window.
After that, return to the integration steps and click the next button.
![]()
If you can’t see a pop-up, please reach out to us at support@yuspify.com
The feed won’t sync the first time:
- UNAS: Check whether feed export is enabled on the UNAS admin. You can find this under Settings – External connections – Price comparison export, feed.
- Shoprenter: if you experience an error, please contact us.
- Further webshops:
Please check if the feed URL is in *.csv or *.xml format if its a custom feed.
We accept feed formats from the following third-party devices:
- Google Shop
- Árukereső
- Facebook Remarketing
In the case of the feed format designed for this purpose, the following product parameters are required in the feed, with the names listed next to them:
Mandatory product features
Item property name | Item identifier technical name – as it should appear in the feed |
Item identifier | itemId |
Product name | title |
Item price | price |
Discount item price | discountPrice |
Item link | url |
Image link | imageUrl |
Stock status | inStock |
Category identifier | categoryId |
Optional product features:
Item property name | Item identifier technical name – as it should appear in the feed |
Group identifier (same product, different color, shape, size, etc.) | groupId |
Product description | description |
The amount of discount in percentage | discountPercent |
Category path | categoryPath |
Number of products in stock | stockCount |
Product status | status |
Product color | color |
Product size | size |
Product brand | brand |
If you experience any errors regarding the visibility of the recommendation boxes, please contact our team: support@yuspify.com
If you experience any errors in our editor, please contact our team: support@yuspify.com
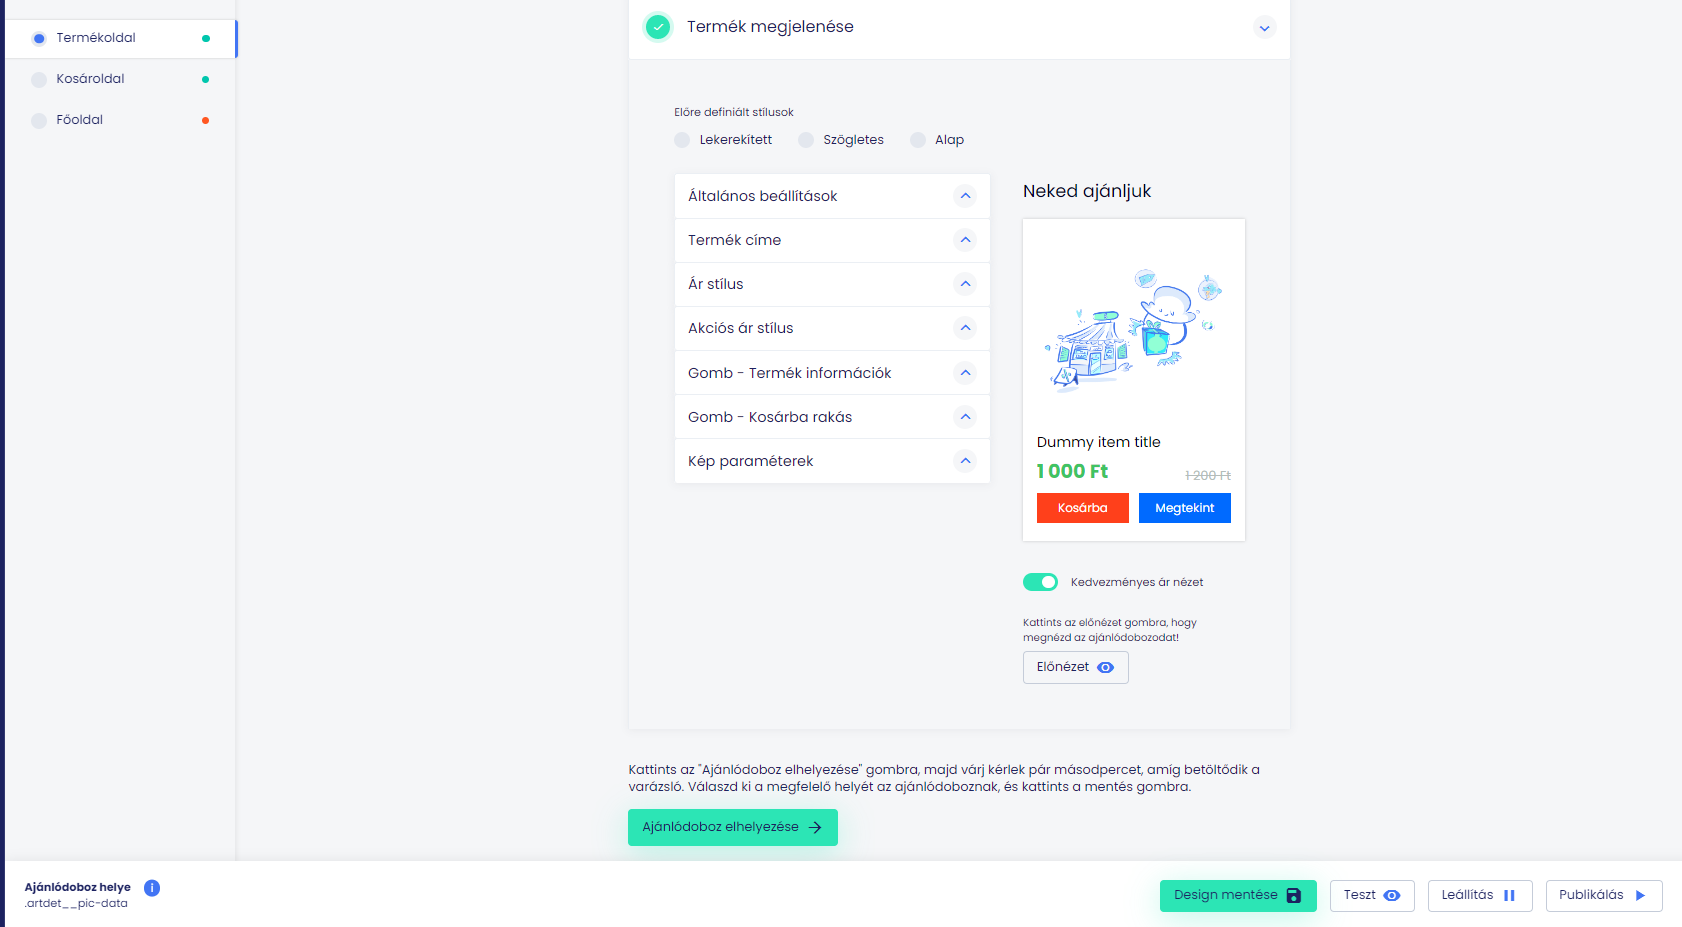
If you make changes to a design, always click the Save Design button in the bottom menu bar.
If you want this design to appear on the live page, click the Publish button.
The placement wizard does not appear:
If our wizard does not load in the upper bar, then first try to launch it again from the yuspify admin page by clicking the Place recommendation box button.
Check that you have saved the completed design.
If you still experience any errors, please contact us at support@yuspify.com.
Shoprenter
Our customers who use the Shoprenter webshop receive their invoices through the Shoprenter system.
The payment is initiated from the Yuspify account, under Subscriptions. The system will then redirect you to the Shoprenter admin page via a one-time payment link. This is how you can pay your monthly fees.
You will receive an invoice from szamlazz.hu through the Shoprenter system. In your Yuspify admin account, you only see payment requests.
UNAS and unique webshops:
Payment requests are automatically charged to your bank card or PayPal account. After the invoice has been paid, you can download the Billingo invoices under Invoices in your yuspify admin.
The same invoices are automatically sent to your registered e-mail addresses through Billingo’s system. Please check that it has not been sent to the Spam folder.
Important information about trial period and billing
As soon as everything is in place, the algorithms of the recommendation boxes begin to analyze the relationship between the behavioral data and the catalog, and learn about the unique nature of the webshops. As time passes and our system collects the right amount of data, it will be able to provide more and more valuable business performance. You will experience positive effects not only in terms of sales volume, but also in terms of user experience.
Check out our case studies to see what results can be achieved with Yuspify.
You can track all of this in your own Yuspify account, just click on the Login button.
If you have any questions, contact us at support@yuspify.com.
On day 13, we recommend that you log into your account and see how our service performed. If you want to continue using it, click on the Subscriptions menu:
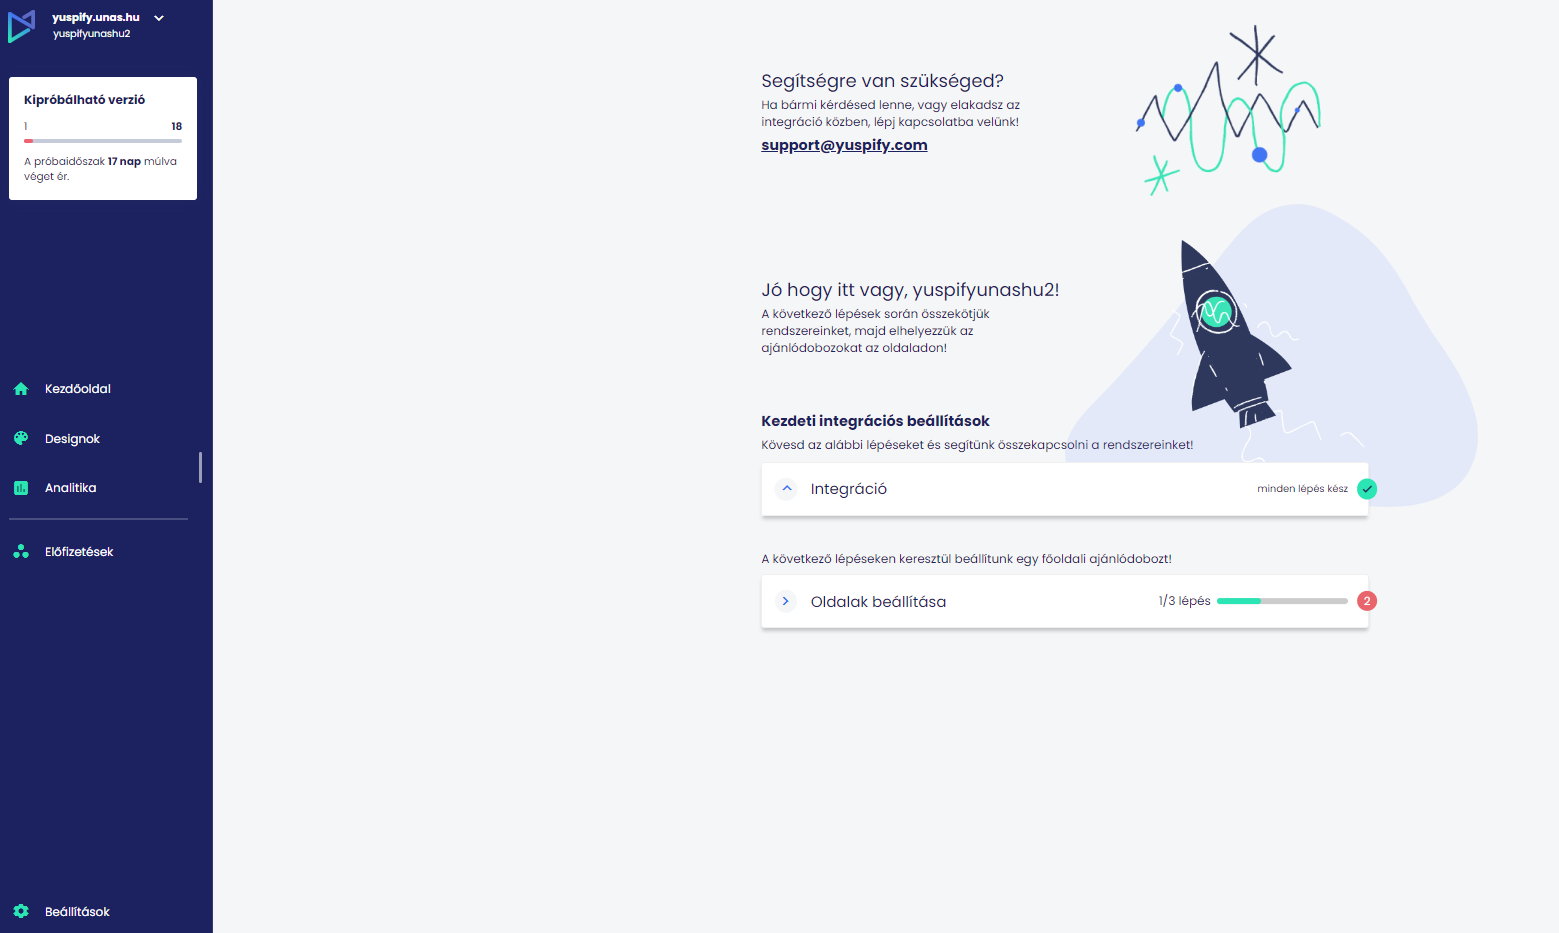
Then enter the billing and card information under My subscription.
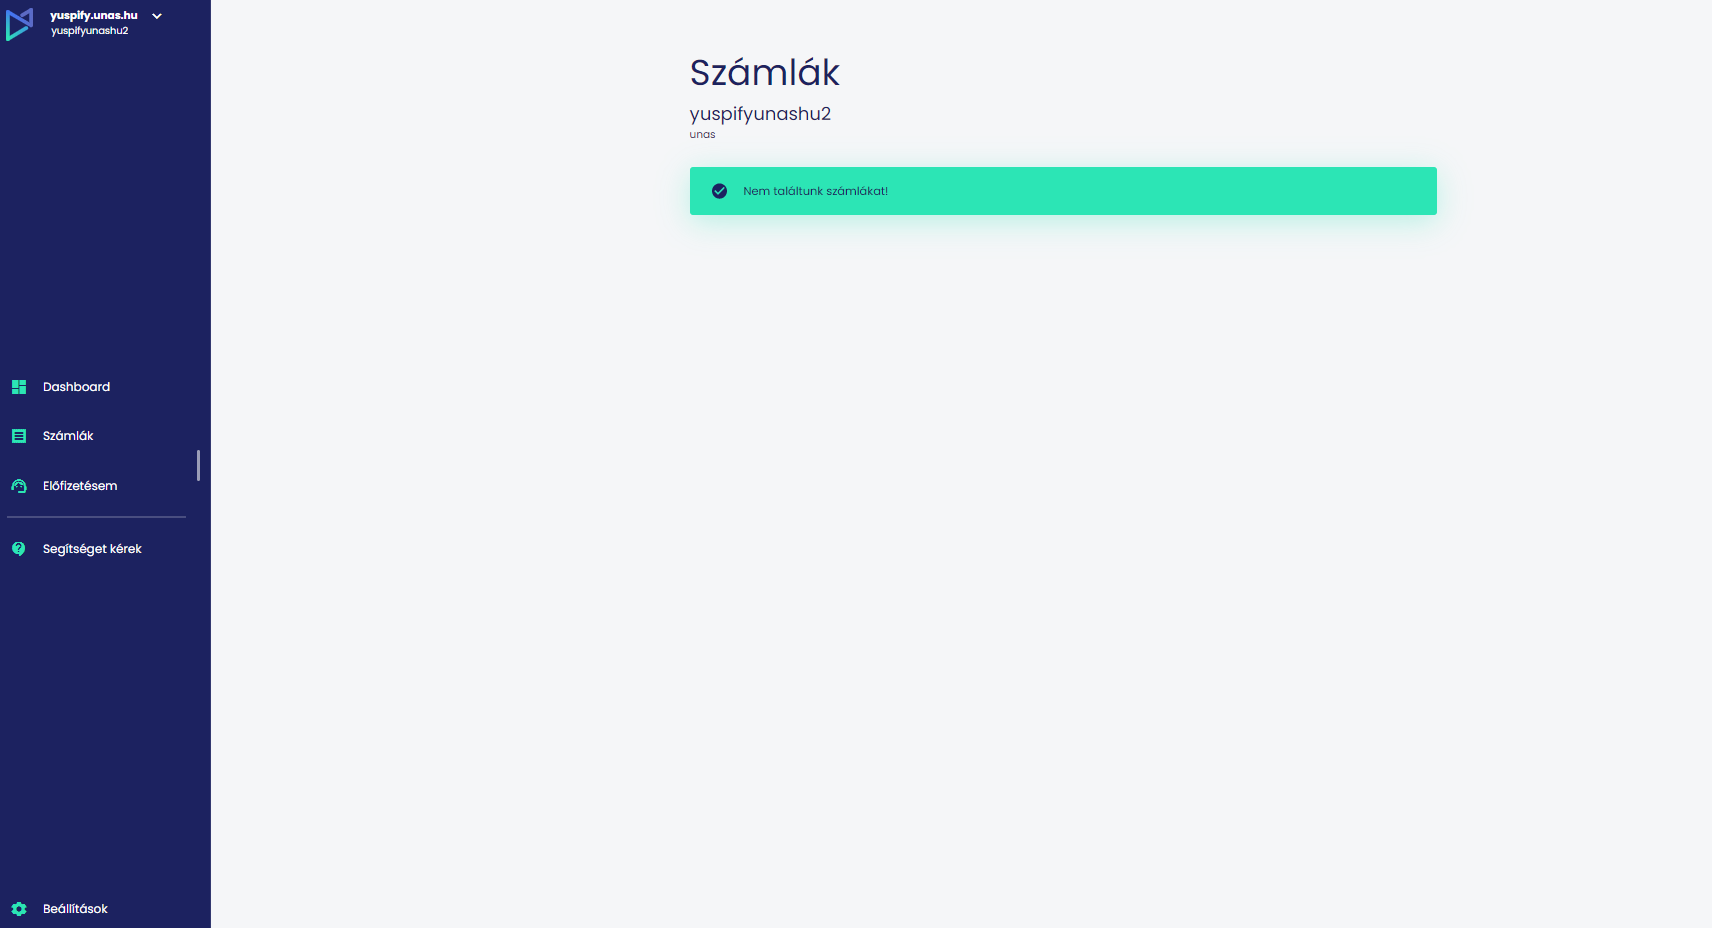
At the end of the 14th day, our service is automatically activated and your first invoice is created.
The charge is attempted 3 times, if it is unsuccessful, our service becomes inactive, but the creation of the charge entails a payment obligation.
Based on the traffic during the trial period, you can see which package is expected to be suitable for you. We have four types of packages that you can choose from:
Plans
Plan | Base fee*(USD) | Nr of recommendations / month | Overusage* / 1 000 recommendations |
Bronze | 49$ | 50 000 | 0.98 |
Silver | 299$ | 500 000 | 0.66 |
Gold | 799$ | 1 500 000 | 0.59 |
Pro | 1 000$ | 6 000 000 | 0.33 |
Prices are net.
Example:
If we served 40,000 recommendations during the 14-day trial period, you will be included in our Bronze package, but you will definitely exceed the 50,000 limit. Your basic fee will thus be $49 net as long as you do not exceed 50,000 referrals (filling in 1 referral box on the page). If you exceed this – for example due to a campaign – you will not automatically be transferred to our Silver package, but will have to pay an overuse fee. That’s $0.98 per 1,000 referrals for the Bronze plan.
As a Bronze customer, you should switch to the Silver package if your consumption is at the recommended level of 300,000 units, because in this case the basic price of the Silver package of $299 net is more favorable than the Bronze package of $49, supplemented by the overuse fee.
Example usage (nr of load) | Example monthly fee | Example SUM (USD) |
65,000 | 49+((15 000/1 000)*0.98) | 64$ |
615,000 | 299+((115 000/1 000)*0.66) | 375$ |
1,735,000 | 799+((235 000/1 000)*0.59) | 938$ |
6,354,000 | 1 000+((354 000/1 000)*0.33) | 1,117$ |
There is no loyalty period for using Yuspify, only a 30-day notice period. During this period, we ensure that recommendations are served.
A page load is a technical event that the website serves when a user navigates to a specific page.
The page load (pageview) can be roughly defined as the product of the number of unique customer visits and the average page views.
You can view this in your Google Analytics account or in the admin interface of your webshop.
Invoicing (consumption) is based on the recommendation served. A referral means filling a referral box, regardless of how many products appear in it.
With the help of our pricing calculator, you can calculate which package is expected to be the most suitable for you, just enter the number of your monthly page loads. This will be the product of your total monthly visitors and the average number of pages viewed.
It is important that page load is not equal to the number of recommendations served. If, for example, many people visit your Blog page, but there is no product recommendation box, then the visit will increase the number of your page views, but not the number of recommendations served.
Az első számla résszámla lesz, az adott hónapban a próbaidőszakon túl igénybevett napok alapján. A számlák két tételt tartalmaznak:
- előfizetési csomagnak megfelelő alapdíjat, ami mindig az aktuális hónapnak megfelelően előre fizetendő (mint egy albérleti díj),
- túlhasználati díjat, abban az esetben, hogyha a csomagban foglalt ajánlások számát túlléptétek a megelőző hónapban (mint a rezsi költség).
Nézzük meg egy Bronze csomagos példán keresztül.
- a csomagban foglalt ajánlások száma: 50 000 db
- havidíja: nettó 49 dollár,
- túlhasználati díj ebben a csomagban: nettó 0,98 dollár / 1 000 db ajánlás
Ajánlásszám | Tranzakciószám | Generált bevétel (bruttó) | Csomag | Alapdíj | Túlhasználati díj | Havidíj összesen (nettó) |
181,875 | 2222 | 14,088,938 Ft | Bronze | $49.0 | $129.2 | $178.2 |
Ez az ügyfél ebben a hónapban nettó 178.2 dollárt fizetett a szolgáltatásárért, ami az akkor 356 Ft-os dollárárfolyamon bruttó 80 567 Ft-ot jelentett. Ez azt jelenti, hogy 25%-os árréssel kalkulálva (14 088 938 Ft * 0.25), a szolgáltatásunk havidíja 43,7x térült meg.
Sajnálnánk, ha így döntenél. Amennyiben bármilyen kérdésed van, vagy elégedetlen lennél velünk, nagyon örülnénk a visszajelzésednek, hiszen folyamatosan dolgozunk a szolgáltatásunk fejlesztésén, és bízunk benne, hogy visszatérsz hozzánk!
Ha nem szeretnéd, hogy aktiválódjon az előfizetésed, a Beállítások menüpontban kattints az Előfizetés törlése gombra a próbaidőszakod lejárta előtt, és kövesd a lépéseket.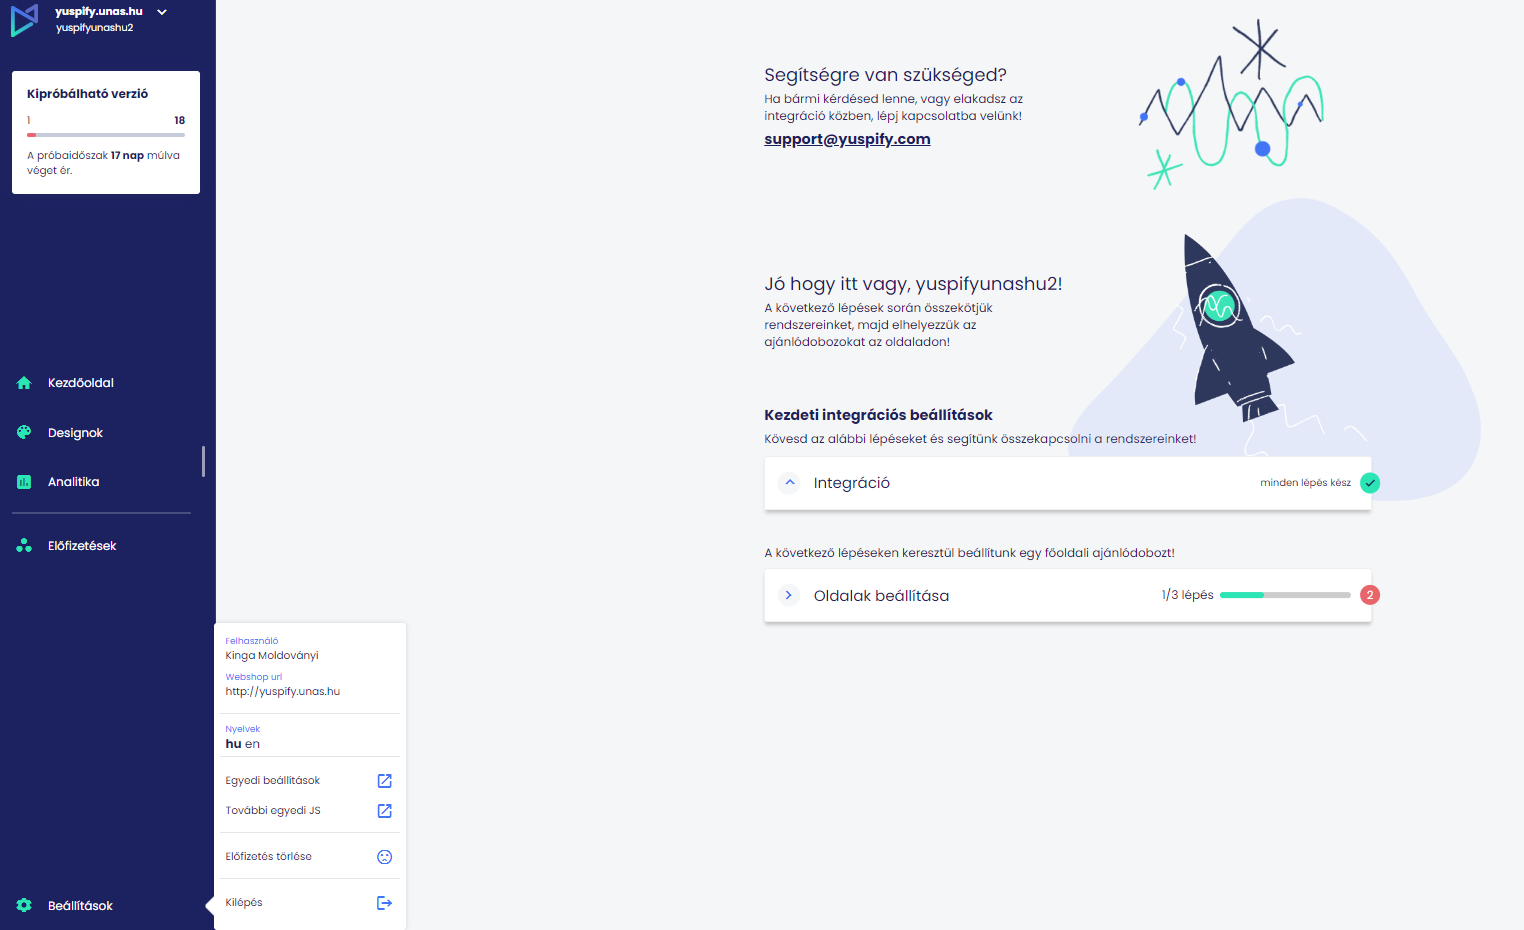
A Yuspify nemzetközi szolgáltatás, és a dollár alapú számlázási forma a legelterjedtebb világszerte, így mi is ebben a valutában számlázunk. Számláidat így dollárban fogod megkapni.
A Shoprenter webshopot használó ügyfeleink a számláik a Shoprenter rendszerén keresztül kapják.
A fizetés indítása a Yuspify fiókból történik, a Számlák menüpont alatt. A rendszer ekkor átirányít benneteket a Shoprenter felületére egy egyszeri fizetésről szóló linken keresztül. Így tudjátok kiegyenlíteni a havidíjatokat.
A számlat a Yuspify fiókotokban, a Számlák menüpontra kattintva éred el.
Természetesen. Készítünk egyedi fejlesztéseket, extra ajánlódobozokat, üzleti logikákat, ajánlódoboz design-t is.
Ilyenkor egyeztetünk a pontos igényeidről, és ezt követően küldünk egy egyedi árajánlatot.
Integration guide for UNAS webshops
We’ll show you how to connect your UNAS webshop with the Yuspify recommendation system in three simple steps.
Első lépésben a yuspify.com oldalon történő regisztrációkor válaszd ki az UNAS platformot, és add meg a kért adatokat.

Menj végig az integrációs lépéseken:
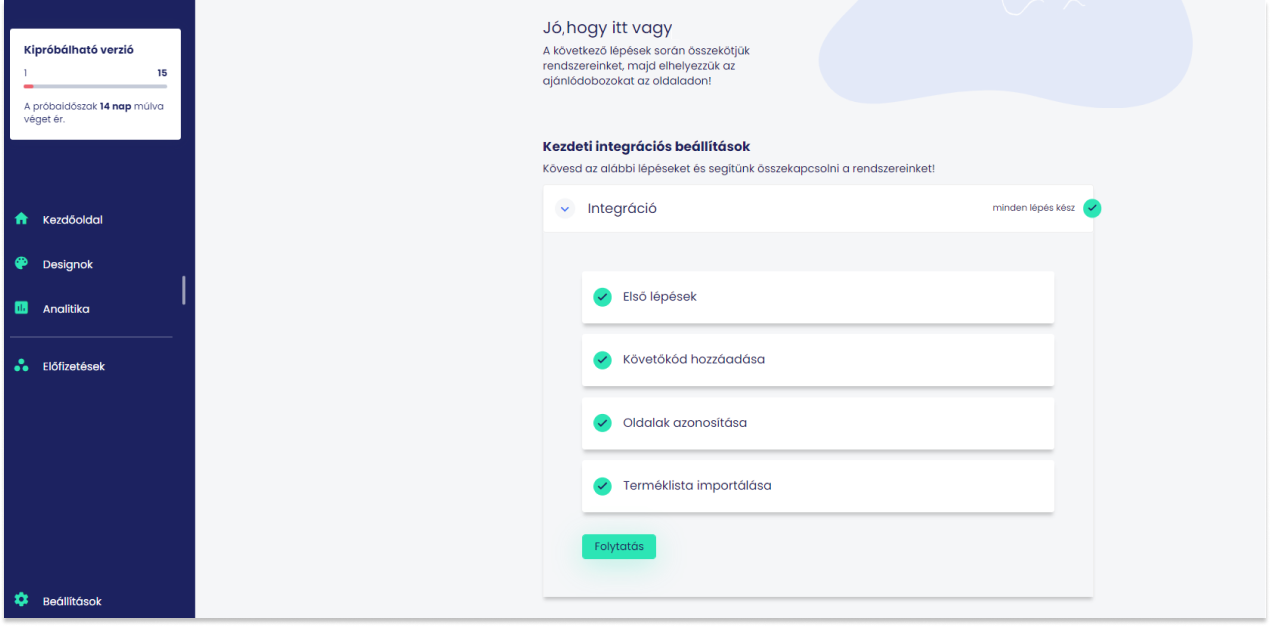
Az UNAS admin fiókod felületén
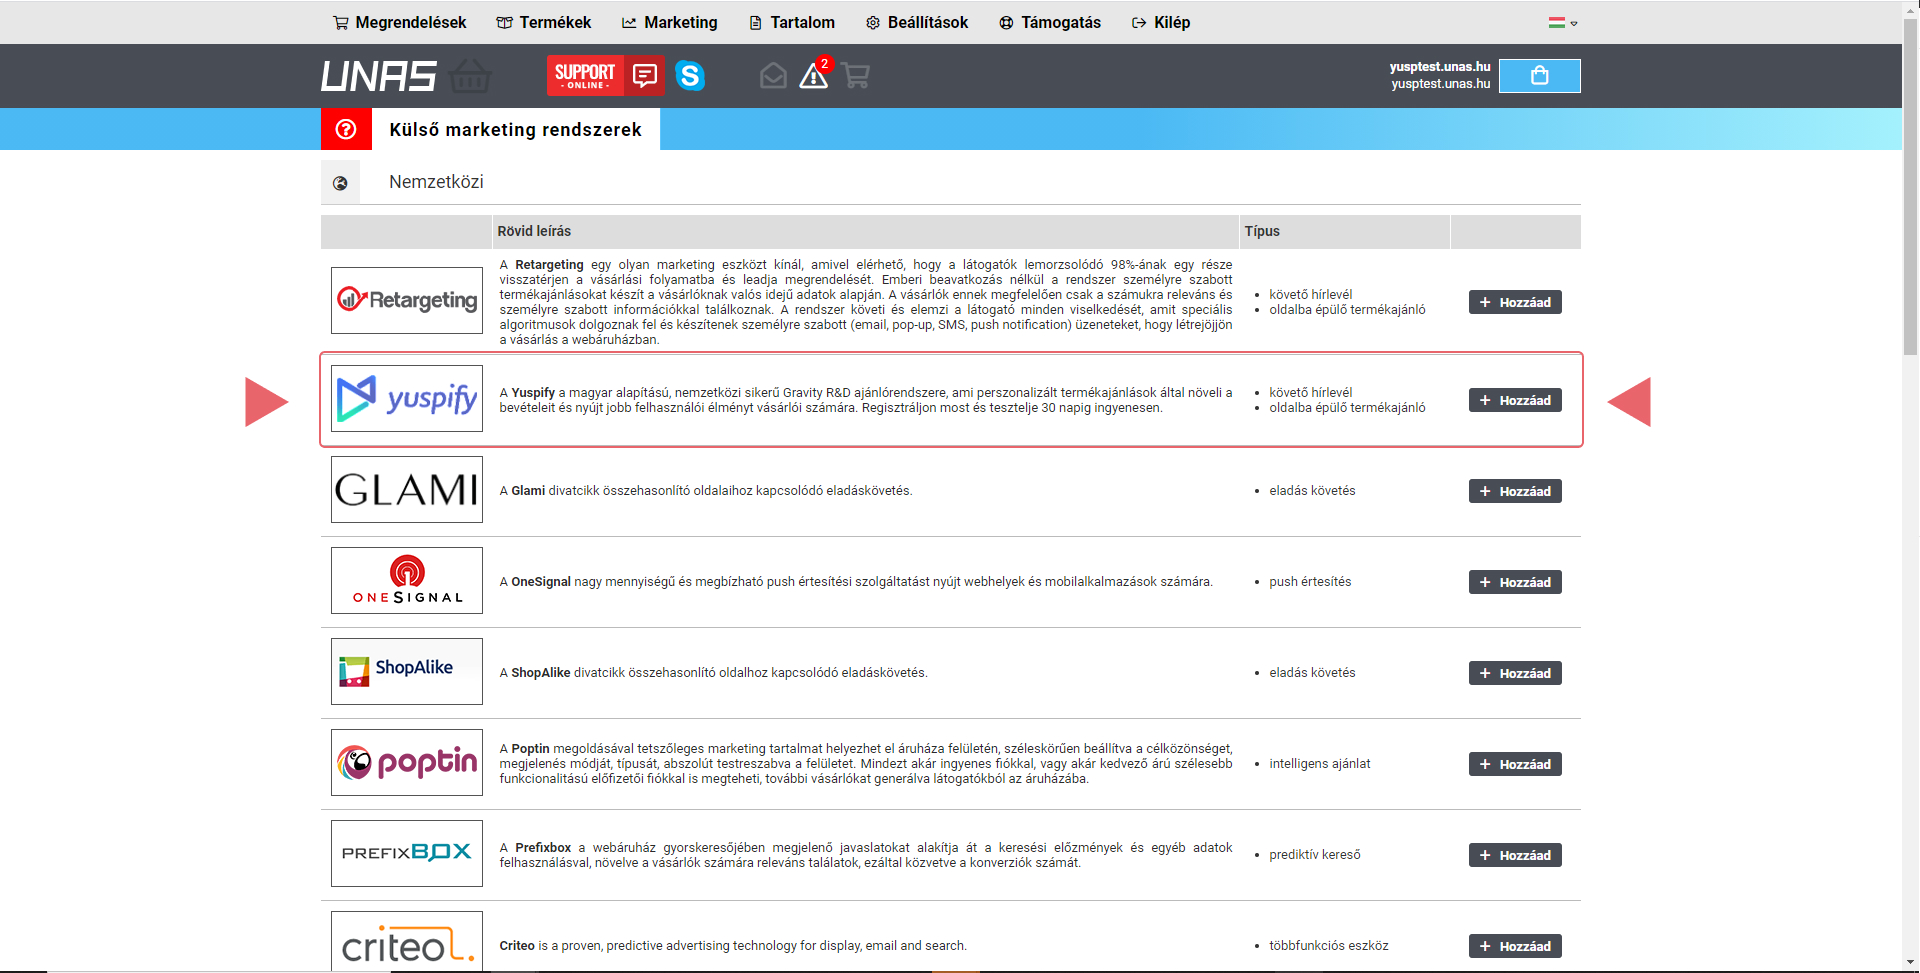
- keresd meg a külső marketing szolgáltatókat a beállításokon belül és válaszd ki a Yuspify-t,
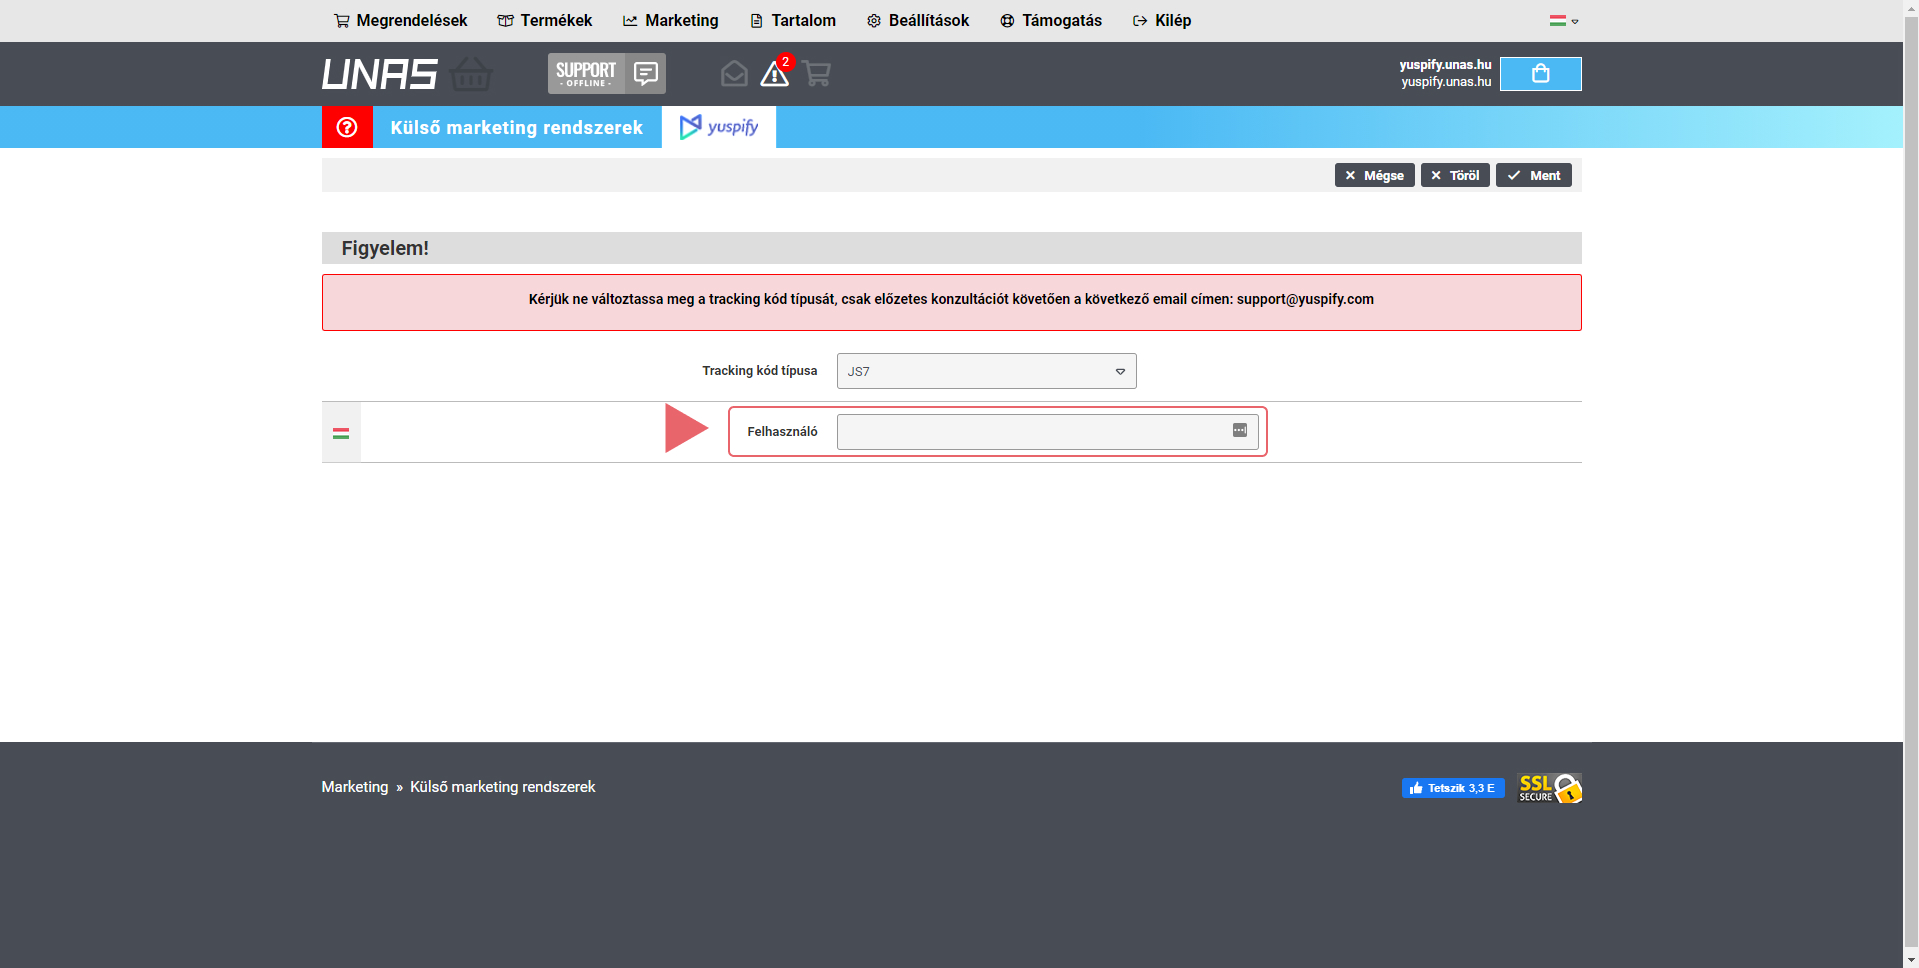
- másold be a pontos Yuspify azonosítódat és ellenőrizd, hogy a kapcsoló JS7-en áll-e,
- végül pedig a yuspify admin felületén ellenőrizd, hogy sikeresen megtörtént-e a követőkód beillesztése.
![]()
Ahhoz, hogy a leginkább releváns termékajánlatokat tudjunk szolgáltatni a webshopodon a vásárlóid számára, rendszeresen szinkronizálnunk kell a termékkatalógusod a Yuspify adatbázisába. Ezzel elkerülhető, hogy a készletből időközben kikerülő terméket ajánljuk, vagy épp nem frissített termék paramétereket – például akciós ár – mutassunk a vevőidnek.
Ezért szükség van a katalógusod exportjának engedélyezésére. Ezt a Beállítások – Külső kapcsolatok – Árösszehasonlító export, feed menüpont alatt találod.
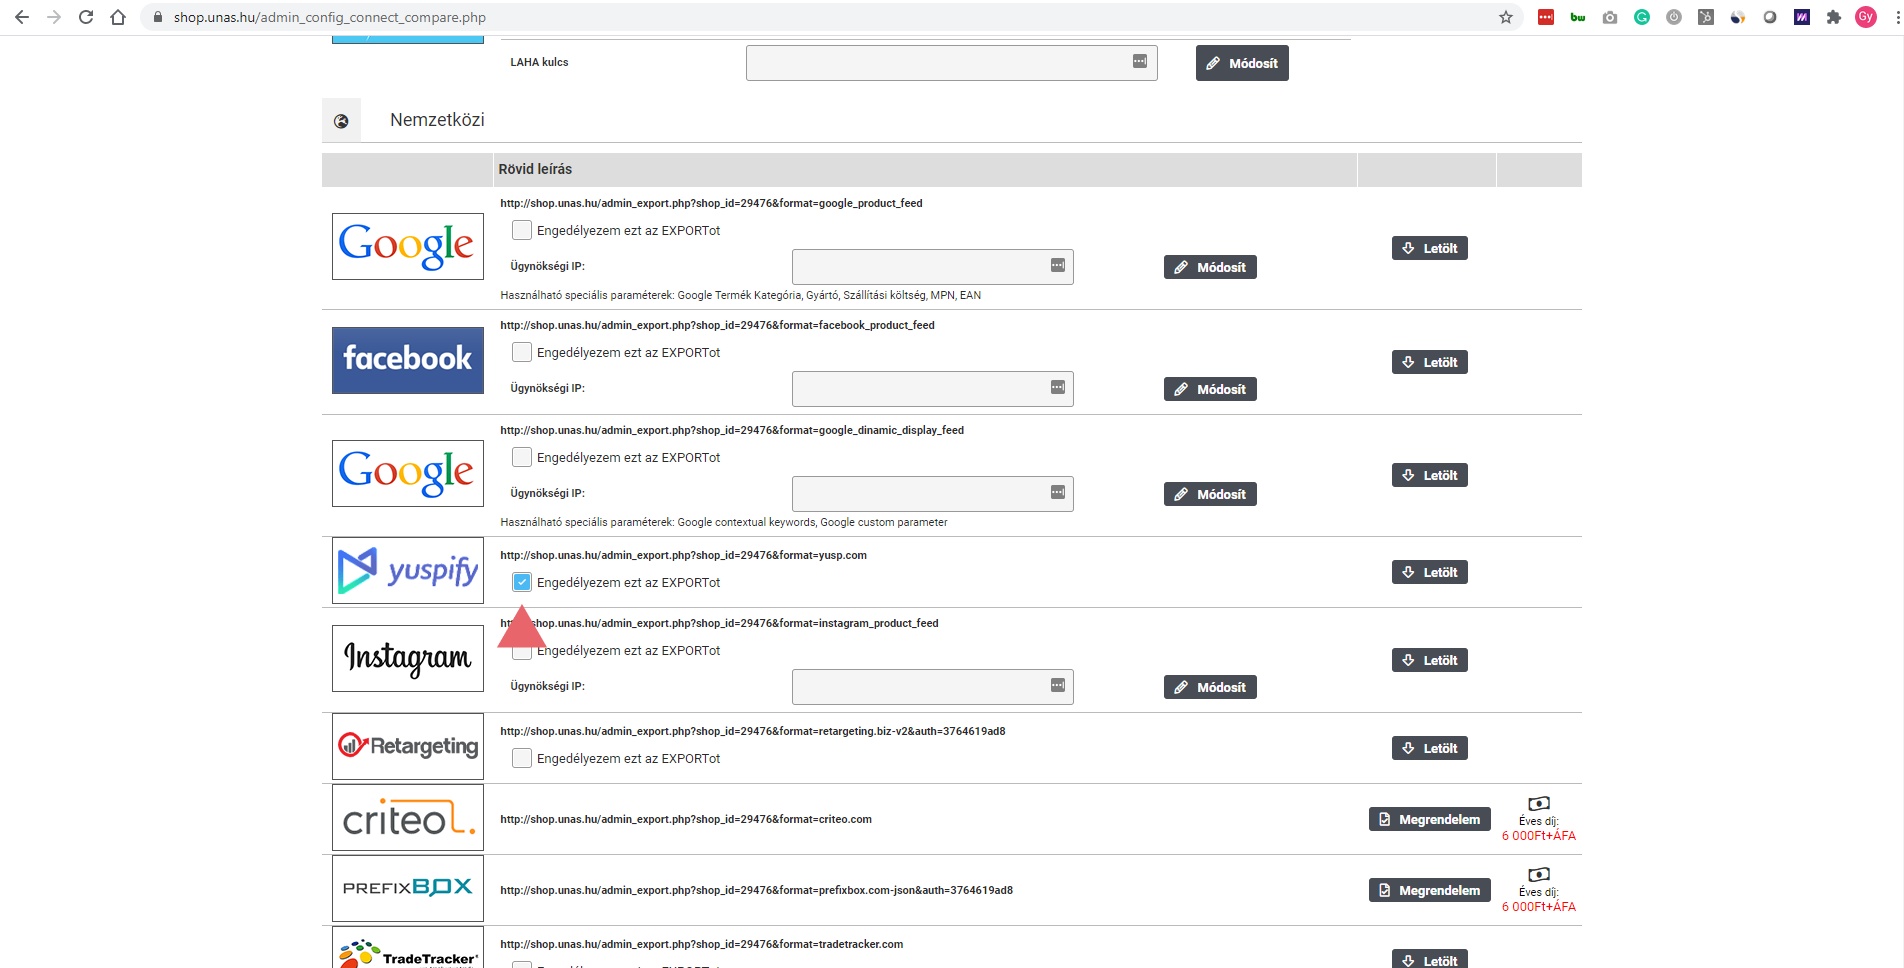
Kattints a terméklista ellenőrzése és mentése gombra, hogy megbizonyosodj az összekötés sikerességéről. Ez a folyamat a háttérben megtörténik, közben nyugodtan elkezdheted megtervezni a termékajánló dobozokat.
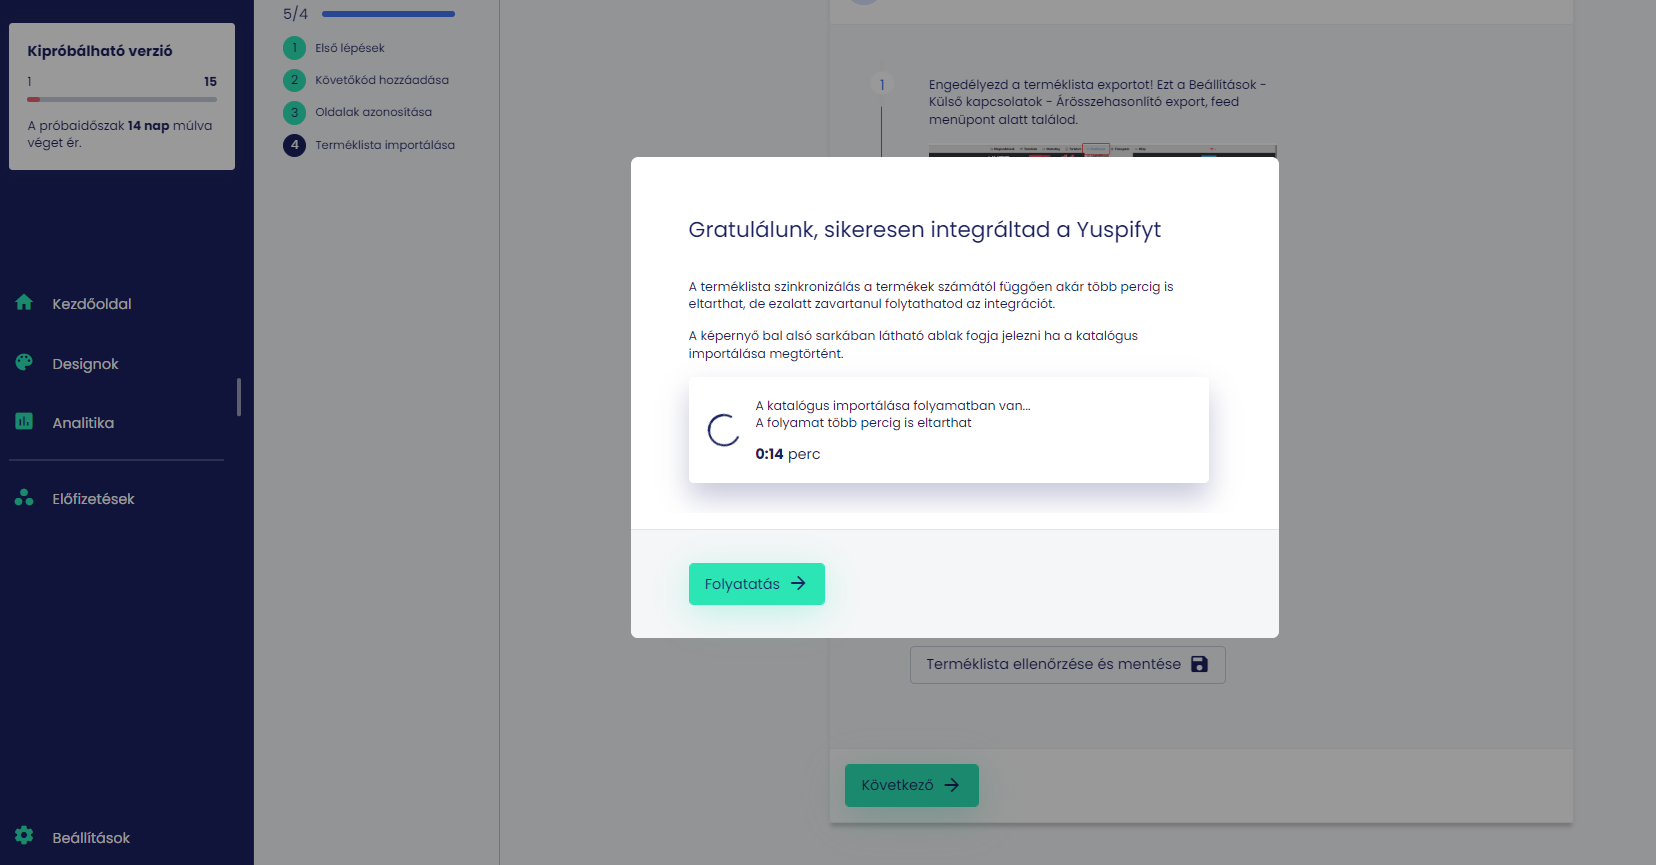
Congratulation!
You have successfully completed all steps and successfully integrated our systems!
In this case, the Yuspfy admin interface redirects you to edit the visual settings, where you can start designing our product recommendation boxes.
You can find a more detailed presentation of this in the Recommendation box editor section.
I'd rather download the whole document
Integration guide for Shoprenter webshops
We help you connect your Shoprenter webshop with the Yuspify recommendation system in three simple steps
Első lépésben a Shopretner fiókodon belül az alkalmazások közt keresd meg a Yuspify-t, majd kattints a telepítés gombra.
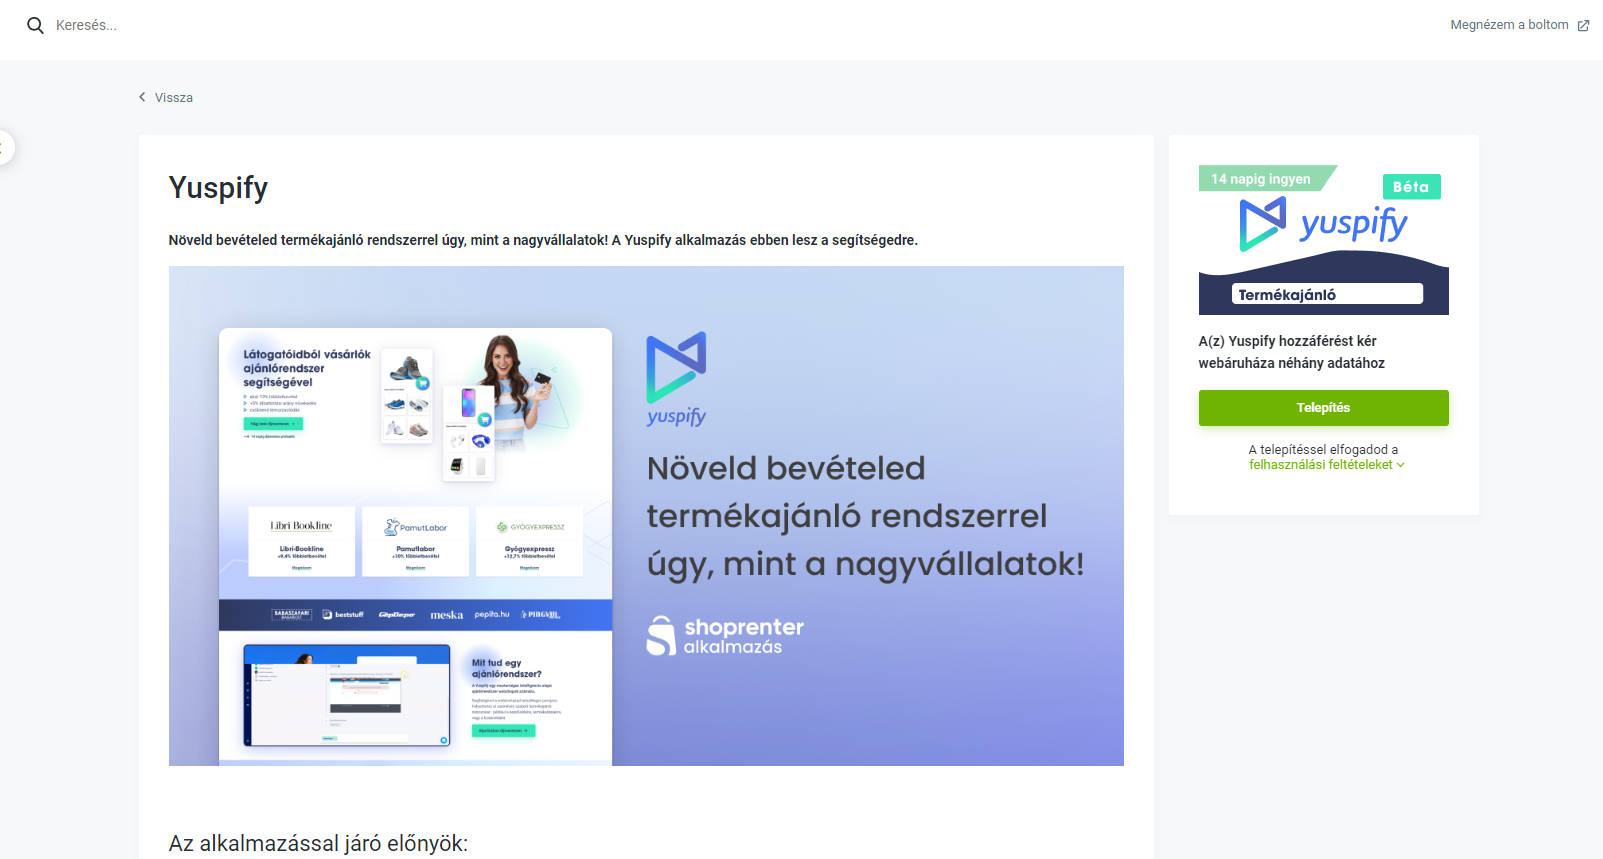
A telepítést követően töltsd ki a yuspify.com regisztrációs felületén a hiányzó adatokat és kattints a regisztrálok gombra. Ezt követően a Yuspify fiókod pár perc alatt elkészül, és be is tudsz jelentkezni.

Kövesd végig a sikeres integrációt ellenőrző lépéseket néhány kattintással. A két fontos sikeres lépés a követőkód bekerülése, és a katalógus sikeres importálása.
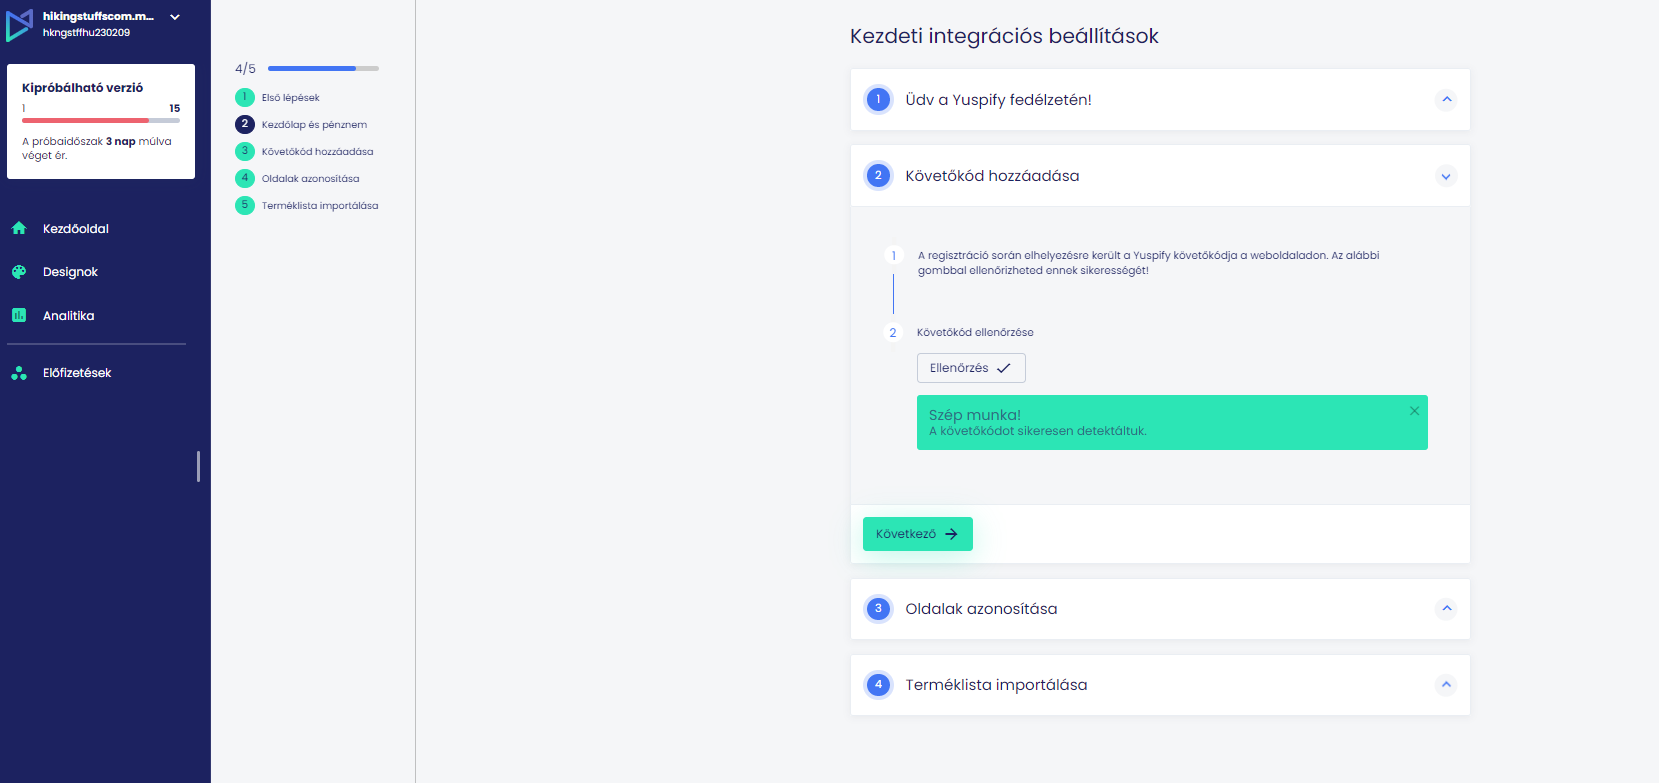
Ahhoz, hogy a leginkább releváns termékajánlatokat tudjunk szolgáltatni a webshopodon a vásárlóid számára, rendszeresen szinkronizálnunk kell a termékkatalógusod a Yuspify adatbázisába. Ezzel elkerülhető, hogy a készletből időközben kikerülő terméket ajánljuk, vagy épp nem frissített termék paramétereket – például akciós ár – mutassunk a vevőidnek.
Ezért szükség van a katalógusod exportjának engedélyezésére.
A katalógusod mérettől függően pár perc alatt szinkronizálódik a háttérben, közben elkezdheted az ajánlódobozok megtervezését.
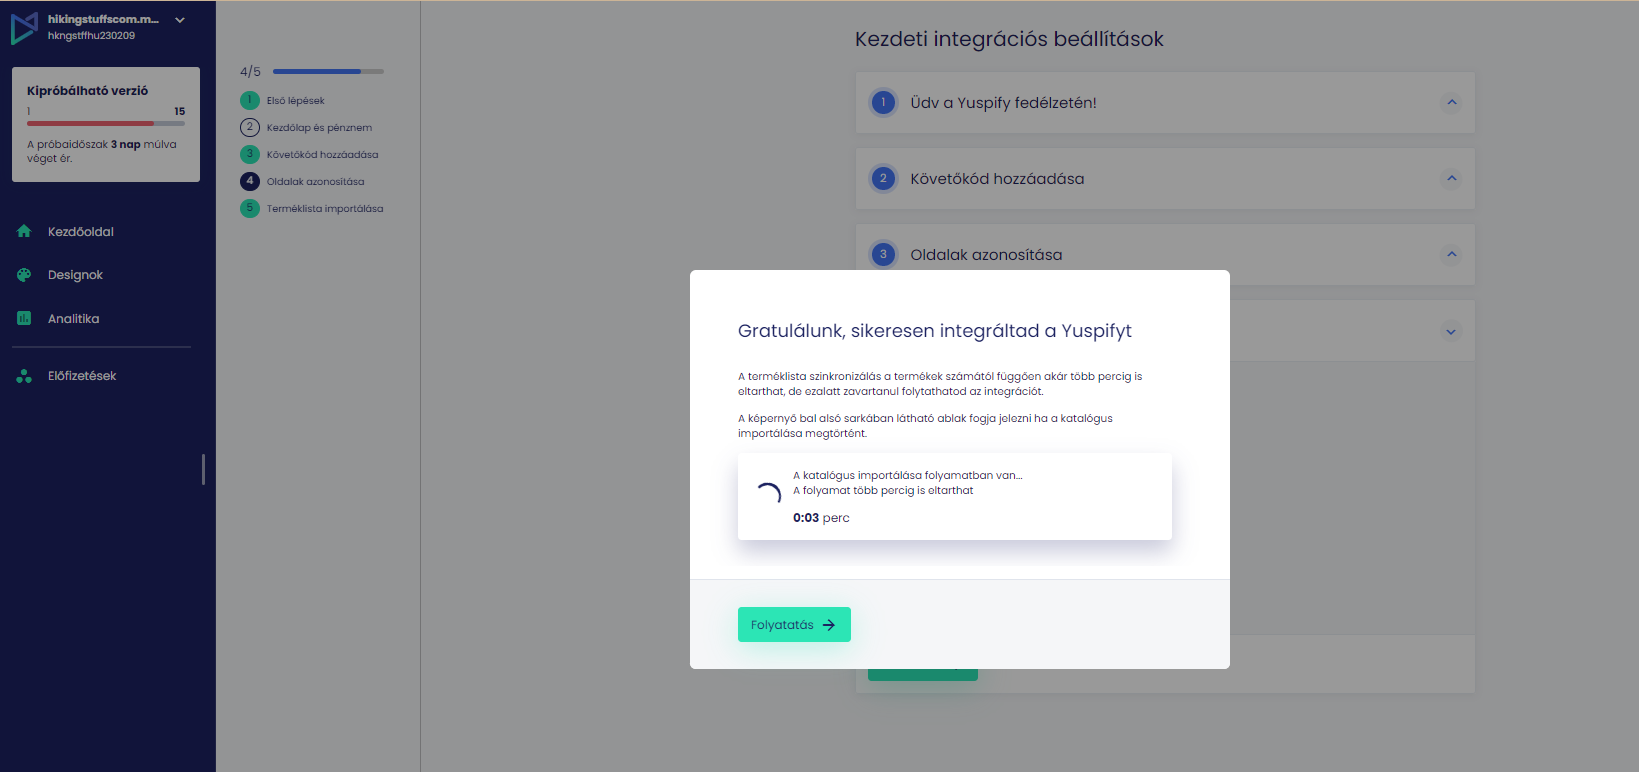
Congratulation!
You have successfully completed all steps and successfully integrated our systems!
In this case, the Yuspfy admin interface redirects you to edit the visual settings, where you can start designing our product recommendation boxes.
You can find a more detailed presentation of this in the Recommendation box editor section.
I'd rather download the whole document
Custom integration guide
We are going to help you integrate the Yuspify recommendation engine to your webshop

First, when registering on the yuspify.com website, select the Custom shop platform and enter the requested data.

Follow the integration steps.

Tracking code
The following tracking code should be inserted into the <head> section of your webshop.
<head> ‘customername.engine.yusp.com’, ‘customername‘); |
Cookie Consent (GDPR)
With the tracking code mentioned above, the recommendation boxes will be able to appear. We generate Cookies (gr_reco) for user identification, which we store and are also used in the events. This will not cause any problems if the user accepts using Marketing Cookies. If the user opts not to accept the cookies (gr_reco), the storage and sending of them can be turned off (since it would violate GDPR laws), but the recommendation request will still be served.
For GDPR compatibility a new cookie is created as gr_optout, and its value is 1 by default. In this case our system is not storing the gr_reco Cookie, therefore it is not sent in the events or in the recommendations requests. If this value is 0, the Cookie is sent and we can make personalized recommendations.
We recommend that this tracking code is always included in your site and also the system checks if the user has accepted the Marketing Cookies. If they have accepted them, a gr_optout=0 Cookie, and if they have not, a gr_optout=1 Cookie must be included. When the user accepts Cookies, the gr_optout must be modified to 0. This will cover both new and returning users.
In order to be able to provide the most relevant product offers to your customers on your webshop, we need to regularly synchronize your item catalog with the Yuspify database. This avoids recommending a product that is temporarily out of stock, or showing item parameters that have not been updated – for example, a discount price – to your customers.
Catalog
Please use a catalog URL, which can be:
- Google Shopping,
- Facebook remarketing,
- Árukereső feed,
- Custom
In the Custom case the exact parameters can be seen on this link.
l
The standard solution for synchronizing products at Yuspify is synchronizing the item feed created from the catalog. The feed is a special version of the catalog:
- in which only a fraction of the item properties are present,
- includes all products,
- typically in CSV, XML format,
- it is automatically updated at least once a day, so it always contains the current catalog,
- available at a specific url.
We typically need this item catalog feed in *.csv or *.xml format, but there are also predefined, more common feed formats that Yuspify supports by default, so you don’t need to create a separate feed format to connect to us.
We can accept feed formats from the following third-party devices:
- Google Shop
- Árukereső
- Facebook Remarketing
In the case of the feed format designed for this purpose, the following product parameters are required in the feed, with the names listed next to them:
Mandatory product features
Item property name | Item identifier technical name – as it should appear in the feed |
Item identifier | itemId |
Product name | title |
Item price | price |
Discount item price | discountPrice |
Item link | url |
Image link | imageUrl |
Stock status | inStock |
Category identifier | categoryId |
Optional product features:
Item property name | Item identifier technical name – as it should appear in the feed |
Group identifier (same product, different color, shape, size, etc.) | groupId |
Product description | description |
The amount of discount in percentage | discountPercent |
Category path | categoryPath |
Number of products in stock | stockCount |
Product status | status |
Product color | color |
Product size | size |
Product brand | brand |
You can download an example CSV here
You can download an example XML here
Item ID:
In the administration system serving the catalog, these identifiers uniquely identify the products, typically the SKU (stock keeping unit).
Product Name:
The product name that is displayed on the shop interface.
Item price:
Standard price of the product. There are several types of schools to show this, it can be net or gross price.
It is important to display the same price here as on the shop interface in all cases, so that your users are not confused.
Discount item price:
When a product is discounted, this is the discounted price that we display on the shop interface.
When this price is displayed, the original price is typically distinguished visually (for example, by crossing it out). In the case of a unique design, it can also receive a discount tag.
Item link
When a product is clicked from the recommendation box, this URL will direct the user to the appropriate product page.
Image link
We must display images for each product in the recommendation boxes. We request these product images from the webshop’s database – if we have the link to the given product image, we can display it in your offer. The format depends on you, but in order to load the page faster, it is worth providing this in webp format.
Stock status
This item property shows whether the product is currently available in stock. This can be true or false.
Category ID
An identifier summarizing products belonging to the same category with a single number.
Group ID
A number that is narrower than the category and designates a group (for example, identical products that differ in size and color).
Product description
Although it is not typical, if you think it is important to display the text product description related to the product, it must be sent to us in the feed.
Amount of discount
In the case of discounted products, the amount of the discount is usually published as labels. These labels typically display percentage values. The value of these discounts must be indicated separately in the feed.
Category path
Unlike the category identifier, this text specifies the full path to the product’s category.
Number of products
If it is important to check the quantity of a product, its value can be entered here.
Product status
Here you can add a description that you might want to display as additional information on a recommendation box, for example a “New” flag for newly arrived products.
Product color
It is needed when there are several identical products in different colors.
Product size
It is needed when there are several identical products in different sizes.
Product brand
The brand of the given product.
PRODUCT_PAGE
For the product page recommendation, our recommendation engine needs the itemId of the specific product currently on the page. It is important that this ID is the same that you send in the feed. For recommendations to work properly, we need to be able to identify product pages. Because of this, please include the following meta tag on your site:
<meta name=”yuspItemId” content=”the itemId, which is also sent in the catalog as itemId by you”> |
The value of the name attribute should always be “yuspItemId” and the content should be the appropriate ID.
Since these tags will only be included on a product page, our recommendation engine can identify each one of them, and our boxes will appear correctly.
When the page is identified, we send a VIEW event automatically.
CART_PAGE
For the cart page recommendation, our recommendation engine needs the itemId(s) of the product(s) currently in the cart. It is important that these IDs are the same that you send in the feed. For recommendations to work properly, we need to be able to identify cart pages. Because of this, please include the following meta tag on your site:
<meta name=”yuspItemInCart” content=” the itemId, which is also sent in the catalog as itemId by you”> |
The value of the name attribute should always be “yuspItemInCart” and the content should be the appropriate ID.
For example: the 3 products in the cart have id1, id2 and id3 identifiers, 3 meta tags should be included like this:
<meta name=”yuspItemInCart” content=”id1″> |
If you would like us to display the recommendation box even if the cart is empty, then please place a meta tag similar to the one above. This will help our recommendation engine to identify the cart page.
In this case the content tag is not required:
<meta name=”yuspItemInCart” content=”” > Or <meta name=”yuspItemInCart” > |
Category Page
Recommendations on Category pages require that we know the category which is being viewed, and also it is useful to know the ‘path’ based on your category hierarchy. Therefore please insert the following meta tags with the appropriate values for the category pages for which you would like the recommendation:
<meta name=”yuspCategoryId” content=”here should come the given identifier of the category”> <meta name=”yuspCategoryPath” content=” here should come the path “> |
Of course, we are asking for the same identifiers that you also send in the feed.
BUY event
The insertion of the buy event tracking code is used to measure the total revenue generated by the webshop and the revenue generated by the Yuspify recommendation engine. Without this, we will not be able to track the completion of the transactions, so the measurements will be incomplete. The code below should be placed at a point where you know for sure that the purchase was made – such as the Thank you page. The parameters should be filled depending on the purchased item.
- itemId: this must be the same as what you sent us in the feed, and it is important that you send it for each item in that order.
- unitprice: in all cases, this is the gross price at which the product was sold, so in the case of a discount, for example, the discount price / special price must be entered here.
- quantity: in each case, it shows how many pieces of product was bought
- orderId: this is an order identifier for 1 order, so for an order containing more than one item, it must be the same for each one of them.
var _gravity = _gravity || []; _gravity.push({ type: “event”, eventType: “BUY”, itemId: “babydesigndumbo2011”, unitPrice: “16510”, quantity: “1”, orderId: “29476-833425” }); |
By sending the following events, you can significantly increase the efficiency of our recommendation engine.
ADD_TO_CART
Adding to the cart is done by pressing a button or a link. If possible, please add an attribute (dataset element) called data-yuspaddtocart to the <a> or <button> tags to make the recommendation system work better. Its value should be the ID of the given item (this should be the same ID as the one sent in the feed), which can be added to the cart by pressing the button / link.
<button [….] data-yuspaddtocart=”itemID” > <a [….] data-yuspaddtocart=”itemID” > |
Based on these, we will be able to easily identify which items are added to cart.
REMOVE_FROM_CART
Removing from the cart is done by pressing a button or a link. If possible, please add an attribute (dataset element) called data-yuspremovefromcart to the <a> or <button> tags to make the recommendation system work better. Its value should be the ID of the given item (this should be the same ID as the one sent in the feed), which can be removed from the cart by pressing the button / link.
<button [….] data-yuspremovefromcart =”itemID” > <a [….] data-yuspremovefromcart=”itemID” > |
Based on these, we will be able to easily identify which items are removed from the cart.
ADD_TO_FAVORITES & REMOVE_FROM_FAVORITES
Add to and remove from favorites functions can be implemented with separate add and remove buttons / links. It also can be implemented with only one button / link and pressing it again means the other function. Therefore we distinguish two different cases when these two functions are handled together and when they are separate.
The function of adding and removing from favorites are separate units
(In this case, please place 1-1 data attribute (dataset element) on the two buttons / links, according to which functions are responsible for. Both must have the value of the ID of the given item (the same ID as the one you sent us in the feed), which can be added or removed from the favorites by pressing the button / link.)
In this case, please place a data attribute for each of the corresponding buttons / links. Both of their value should be the ID of the given item,
- data-yuspaddtofavorites By pressing the button / link the item can be added to favorites.
- data-yuspremovefromfavorites By pressing the button / link the item can be removed from favorites.
Examples:
<button [….] data-yuspaddtofavorites =”itemID”> <a [….] data-yuspremovefromfavorites =”itemID” > |
The function of adding and removing from favorites is a single unit
In this case, please place 2 data attributes on that button / link and modify their values according to which function they are responsible for.
- data-yuspfavoritesmethod which should have a value
- “add” if you can add it to favorites by pressing that button / link
- “remove” if you can remove it from favorites by pressing that button / link
Please change the value of the attribute as soon as possible after pressing the link/button, before an API call.
- data-yuspitemid its value should be the ID of the given item (the same ID as the one you sent us in the feed), which can be added or removed from the favorites by pressing the button / link.
Examples:
<button [….] data-yuspitemid =”itemID” data-yuspfavoritesmethod=”add”> <a [….] data-yuspitemid =”itemID” data-yuspfavoritesmethod=”remove” > |
If there are elements for both versions on the page, then the buttons / links that implement only 1 function have to use the first method, and where both functions can be performed have to use the second method.
Congratulation!
You have successfully completed all steps and successfully integrated our systems!
In this case, the Yuspfy admin interface redirects you to edit the visual settings, where you can start designing our product recommendation boxes.
You can find a more detailed presentation of this in the Recommendation box editor section.
I'd rather download the whole document

Start our 14 days for free trial, without any commitments
Get ahead of your competitors with the Yuspify recommendations today!
Start free trial
